|
|
|
#1
 05-07-2010, 12:08 PM
|
||||
|
||||
|
Quote:
The Linings should all be replaced. The larger linings inside stiffen the ribs and hinder vibration. Label or no Label put a normal center Brace and a lower and upper brace as well. I think 3 braces are fine regardless of pedigree. My Mougenot has the same single brace and it's coming out and most likely just what I told you for braces. If you like, my bass will be done before this one and I can tell you what was done, if you like. Ok? ok..
__________________
Ken Smith ~ http://www.kensmithbasses.com http://www.kensmithbasses.com/doublebasses/ http://www.facebook.com/KenSmithBasses https://www.instagram.com/kensmithbasses/ https://www.facebook.com/ken.smith.904750 

|
|
#2
05-07-2010, 04:56 PM
|
|||
|
|||
|
Matthew, since you are on the other side of the planet you should have taken the back off first, oh well too late now.
  Fine looking bass there! Good luck with her. To carve the back brace out it shouldn't be to difficult. You might be able to get some controlled splitting and remove the big chunks first, then once down to a bit thinner, you can plane it or keep using a sharp thin headed gouge, finger planes and then wet the last slivers with a damp cloth to remove the splinters and clean the glue off.
|
|
#3
05-08-2010, 10:12 AM
|
|||
|
|||
|
Looks like a nice project Matthew. Give it your best!
|
|
#4
05-09-2010, 11:38 AM
|
||||
|
||||
|
Looks like fun! Love the photo essay! Keep it coming- if you have the time, please!
BG
|
|
#5
05-09-2010, 07:53 PM
|
|||
|
|||
|
Thank you for sharing, Matthew, nice instrument and a lot of work to face!
Did you measured the stop length from the end of the heel or from the upper edge of the front?
|
|
#6
05-09-2010, 08:18 PM
|
||||
|
||||
|
Edge of the heel
|
|
#7
05-09-2010, 09:33 PM
|
||||
|
||||
|
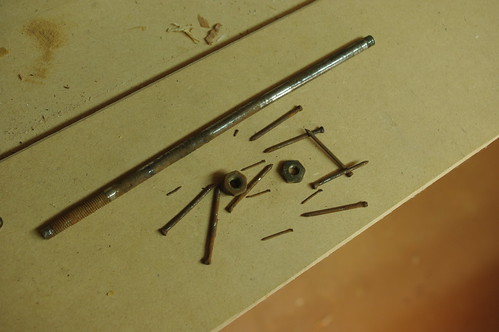
Here’s a summary of the ironwork I’ve removed from this patient to date:
 I had a look to see if the tuners had any identifying marks, but nothing exciting to report. Some of the brass plates are worn at the bearings, but the brass cogs, spindles and the worm gears are perfectly fine. We’ll have to decide whether its worth getting the bearings rebuilt, rebushed or just get new tuners. I’m not a metalworker. 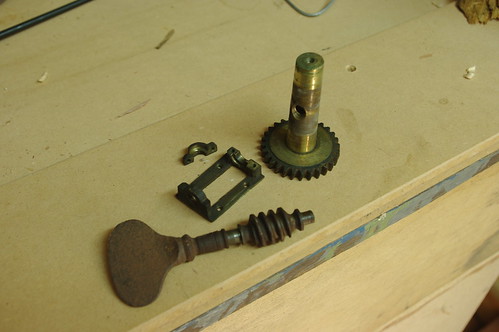 Here’s another bit of fun for later :-( 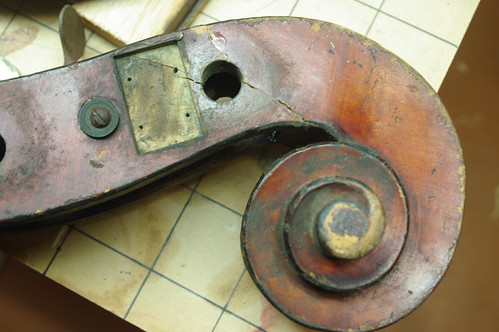 I started gluing some of the newer and cleaner cracks first, and cleaning up glueing edges. 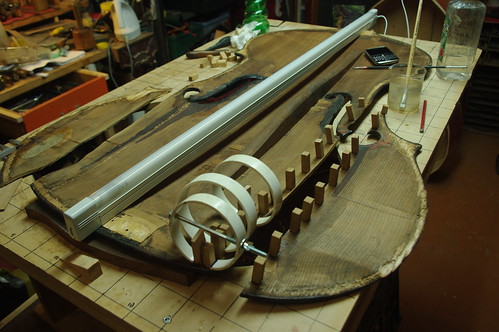 My “in situ” lamp is very useful. 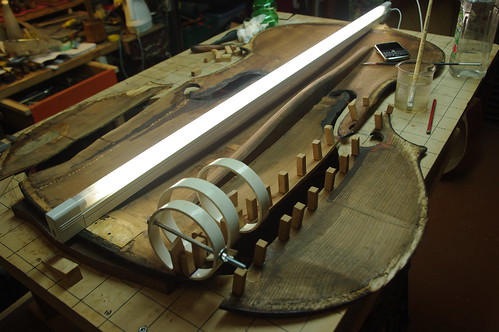 Here’s a horrible mess to clear up. Nails didn’t help at all. 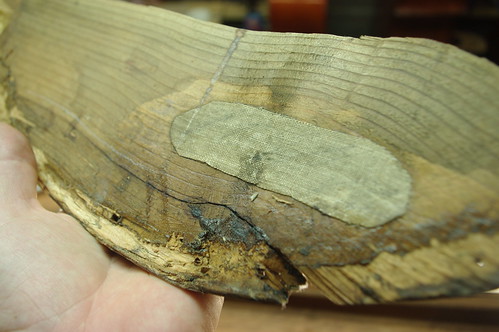 Here’s a closeup of one of the crack edges. The wider part is where the crack sits just below the FFs and the thinner part - about 6-7mm - is the lower bout. I have had to break the longer cracks right open in order to properly clean the gluing surfaces, which are contaminated with varnish and dust and goo. And what looks like read lead paint in places! 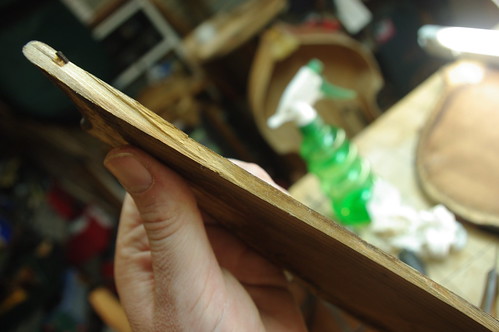 This is a dry run of the first big crack clamping setup. It gets tricky near the FFs where the wood has twisted under bridge pressure. It’s going to be interesting getting this to clamp up tightly. 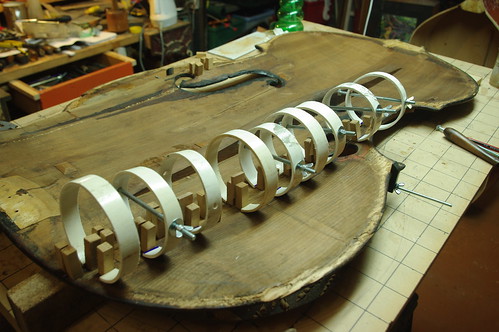
|
 |
| Currently Active Users Viewing This Thread: 79 (0 members and 79 guests) | |
| Thread Tools | |
| Display Modes | |
|
|


 Hybrid Mode
