|
|
|
#1
 09-12-2010, 09:06 AM
|
||||
|
||||
|
The grain is parallel with the centre joint, and the bass bar is parallel with that. Dangerous, as you state!

|
|
#2
09-12-2010, 03:07 PM
|
||||
|
||||
|
Quote:
It is easy to take away wood. It is impossible to put the same wood back. Mane of the basses I have had in restoration over the years needed some breast patching to put wood back in from over re-graduating. Less of the basses I put thru shops to restore needed re-graduating or thinning as some call it. If the bass is left thick (who is to really say if?), then no harm will be done to the bass. If thinned too much, the Top can cave in and crack, needing a huge restoration of re-shaping, crack repairs and breast patches. All because of someones over zealous so called corrections. Maybe it's like a hair cut. Cut is as short as you like but leave the ears..  Funny thing about that (soory Matt for the de-rail) when I've gone for a hair cut at the mall. They ask if I wanna request anyone (for a small fee), and I say, "someone who's done it before".. lol
__________________
Ken Smith ~ http://www.kensmithbasses.com http://www.kensmithbasses.com/doublebasses/ http://www.facebook.com/KenSmithBasses https://www.instagram.com/kensmithbasses/ https://www.facebook.com/ken.smith.904750 
|
|
#3
09-12-2010, 05:19 PM
|
||||
|
||||
|
Quote:

|
|
#4
09-12-2010, 05:54 PM
|
|||
|
|||
|
Quote:
|
|
#5
09-12-2010, 06:52 PM
|
||||
|
||||
|
On the subject of "dangerous" bass bars -
If, as in this case, a grain-parallel bar has yet to encourage a crack, is there really much justification for assuming that it will in the future, left as is? I mean sure, it makes sense to place a new bar across the grain, but I'm not seeing a real reason to replace an otherwise sound bar for this reason.
|
|
#6
09-12-2010, 07:33 PM
|
||||
|
||||
|
Well if the top is overly thick under the bar, and/or the bar is overly heavy and stiff, then you will get a strong top a that spot, no matter what orientation the grain. But this is not necessarily a recipe for a responsive top and optimum sound. Also, this top was NOT intact - as you can see from the earlier pics it was seriously cracked in at least a dozen places; perhaps if the top was more flexible (thickness, arching shape, bar shape) it would not have cracked in that way. Perhaps the strength of the top around the bar itself encouraged cracks to form elsewhere? Perhaps, perhaps not ... who knows? All I know for sure is that the top is quite a bit heavier and less flexible than usual, and the bass bar is also very hefty and stiff. The original bar is intact, sure, but there's no evidence that it is "otherwise sound" if you measure that by how well it performs. So its a matter of using intuition to decide how to achieve the right balance of flex and strength.
@wayne - I think if you are making a plaster mould for each top you work on you must have a very big workshop and be built like a lumberjack! I've never needed to make a full top plaster mould - i'd be interested to see some pics of your setup. I just have the top sitting in an MDF cutout cradle with no sharp edges and clamped in various ways. I don't use any protection on the top either, the MDF is softer than the wood and varnish, but if I feel the top needs any special support I'll use a smallish sandbag underneath. I'd really hesitate to use any kind of tape on the finish - even painter's tape - imagine the feeling you'd get if the solvents in the adhesive reacted with the varnish and the finish came off with the tape No thanks.Last edited by Matthew Tucker; 09-12-2010 at 07:44 PM.
|
|
#7
09-20-2010, 08:44 AM
|
||||
|
||||
|
On the weekend I bit the bullet and decided, after a chat with the owner, to remove the bass bar. I had some assistance from my nephew Luke who has helped me on some of my other builds.
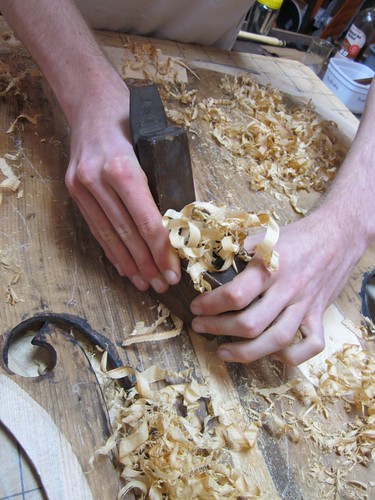 We managed to recuperate some of the original bar to use as repair wood as the timber matches the top in colour and grain width.  After removal the top weighs 1665g.`
|
|
#8
09-20-2010, 08:46 AM
|
||||
|
||||
|
While this was going on I started on making some purfling for the corner repairs.
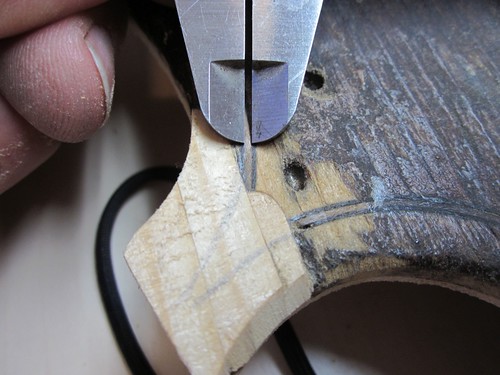 I discovered that the original purfling is made of a pinkish wood, not white. I'm guessing this is some kind of fruit wood like pear or cherry, but not sure what. It's quite hard. I wonder if ID-ing this might help narrow down the bass's origin? I had to hunt through my pile to find something that might match.  The strips are planed down with my large smoother 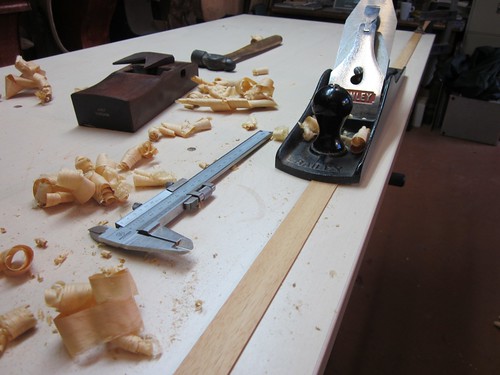 then taken down to the final thickness with my new HNT Gordon smoother with the blade setup as a scraper.   I have made a special jig for bending the purfling to roughly the right shape. sort of a mini fox-bender. I use a heat-gun for heat. 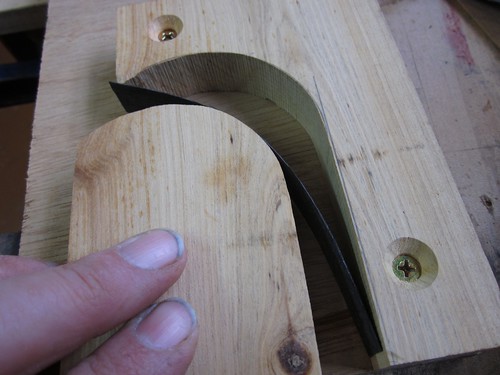 I've tried both PVA and hide glue; in the end, for this pre-bent stuff, the hide glue worked better. 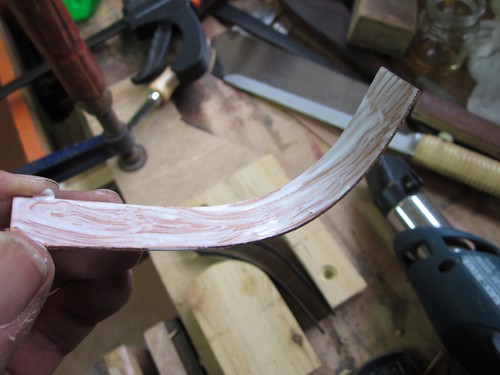 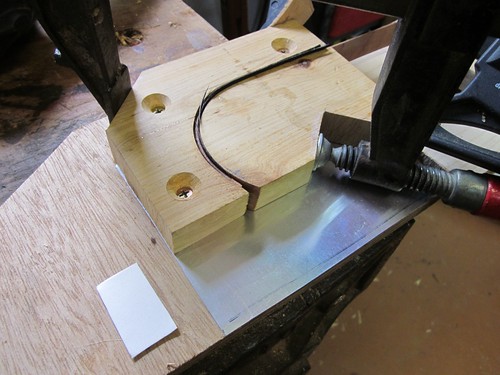 After the glue is dry I cut the bent laminate into strips 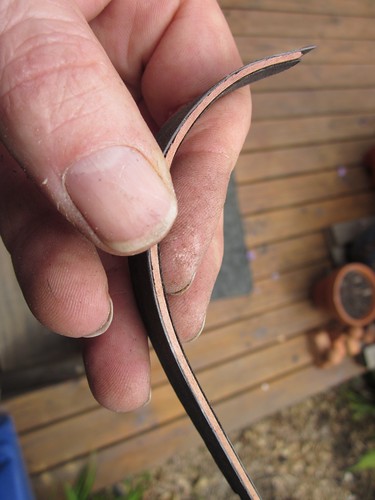 neat, huh?
|
|
#9
09-21-2010, 01:58 AM
|
||||
|
||||
|
Nice jig.
Do you heat the strips first and then put them in, or apply heat while bending? It looks like they're dry, right?
|
 |
| Currently Active Users Viewing This Thread: 61 (0 members and 61 guests) | |
| Thread Tools | |
| Display Modes | |
|
|


 Hybrid Mode
