|
|
|
#1
 10-07-2010, 12:57 PM
|
|||
|
|||
|
In advance I have to thank you all for all the help that I’ve being getting from this here and there… I’m in the process of planning my first acoustic build, with limited resources and experience (Sound like a great combination), and ¾ DB, carved top and back, may be a hybrid… here is my initial development plan:
1-Buy a good book “So ... You Want To Build a Double Bass by Peter Chandler” 2-Get a workshop on making an acoustic guitar, lets say I do live in Atlanta Ga, don’t want to spend a fortune “Woodcraft” have a $600 workshop for that. 3-Get an DB beyond repair, I figured is somebody have a shop they may have a DB that is in un-reparable and get it for a good price (ANY ONE OUT THERE) 4. USE SPRUCE for the top and MAPLE for the back 5. I have no clue just yet So what do you think about my super plan? 
|
|
#2
11-19-2010, 10:26 AM
|
|||
|
|||
|
U guys left me all by my self
 , that's ok... Update!!! I did get some advise from one luthier, I am going to be opening the front to repair the bottom and the back opening, he explained how to…(He recomend not to open never the back because the bass will lost it shape!!!) I am waiting for my DB repair book to arrive, and he also showed me an used ebony fingerboard for $200, nice figure but it worries me a little knot in the back and a little wave in the front, I made a sketch for u guys to see it, by the way if you want to recommend somebody to buy a fingerboard from or you have one send me a PM, I am not at the point where I need one but I would like to start studying the case , that's ok... Update!!! I did get some advise from one luthier, I am going to be opening the front to repair the bottom and the back opening, he explained how to…(He recomend not to open never the back because the bass will lost it shape!!!) I am waiting for my DB repair book to arrive, and he also showed me an used ebony fingerboard for $200, nice figure but it worries me a little knot in the back and a little wave in the front, I made a sketch for u guys to see it, by the way if you want to recommend somebody to buy a fingerboard from or you have one send me a PM, I am not at the point where I need one but I would like to start studying the case
|
|
#3
11-21-2010, 09:52 AM
|
||||
|
||||
|
Quote:
|
|
#4
11-22-2010, 09:49 AM
|
|||
|
|||
|
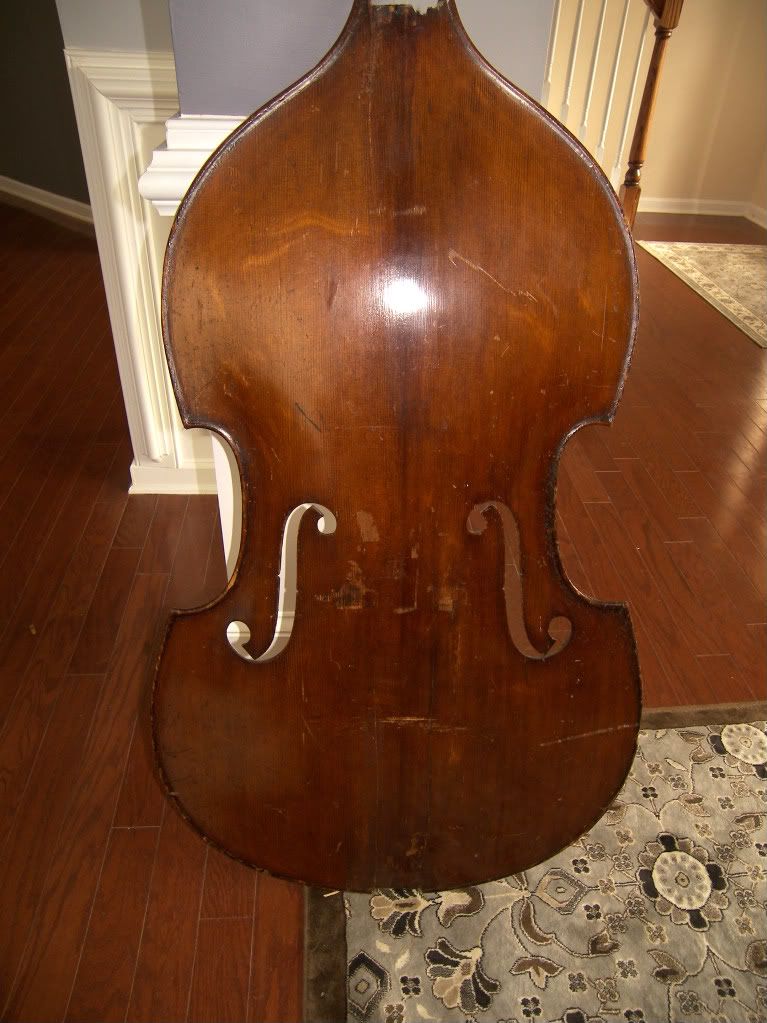
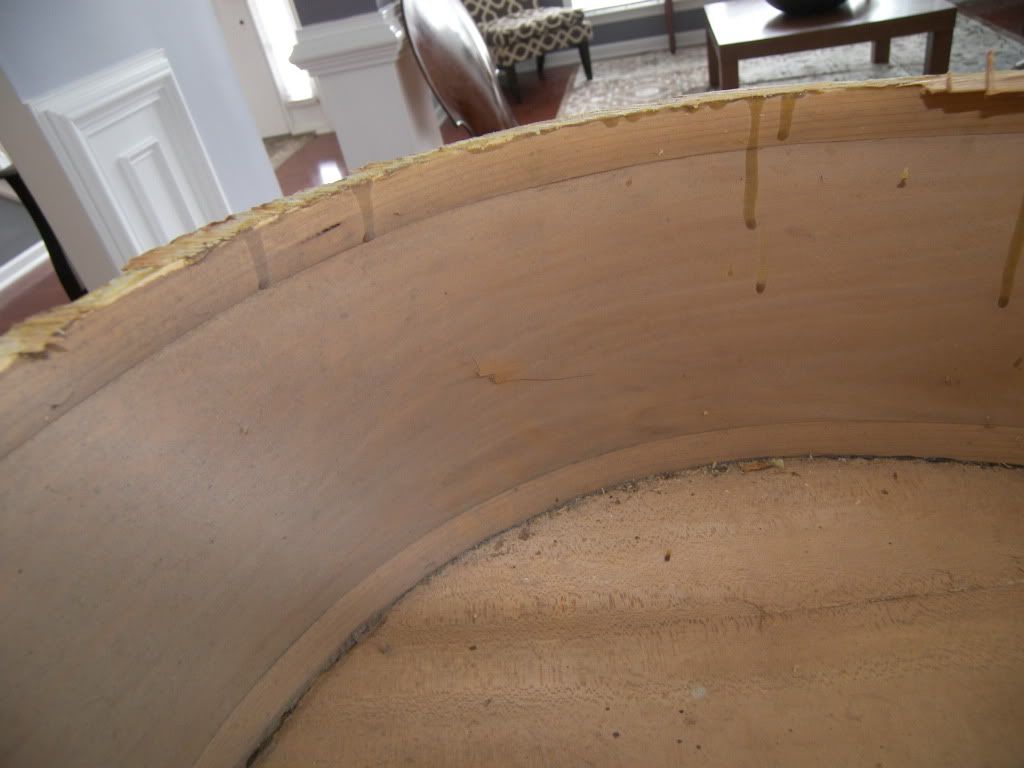
I posted this on TB… this is what I did this weekend:
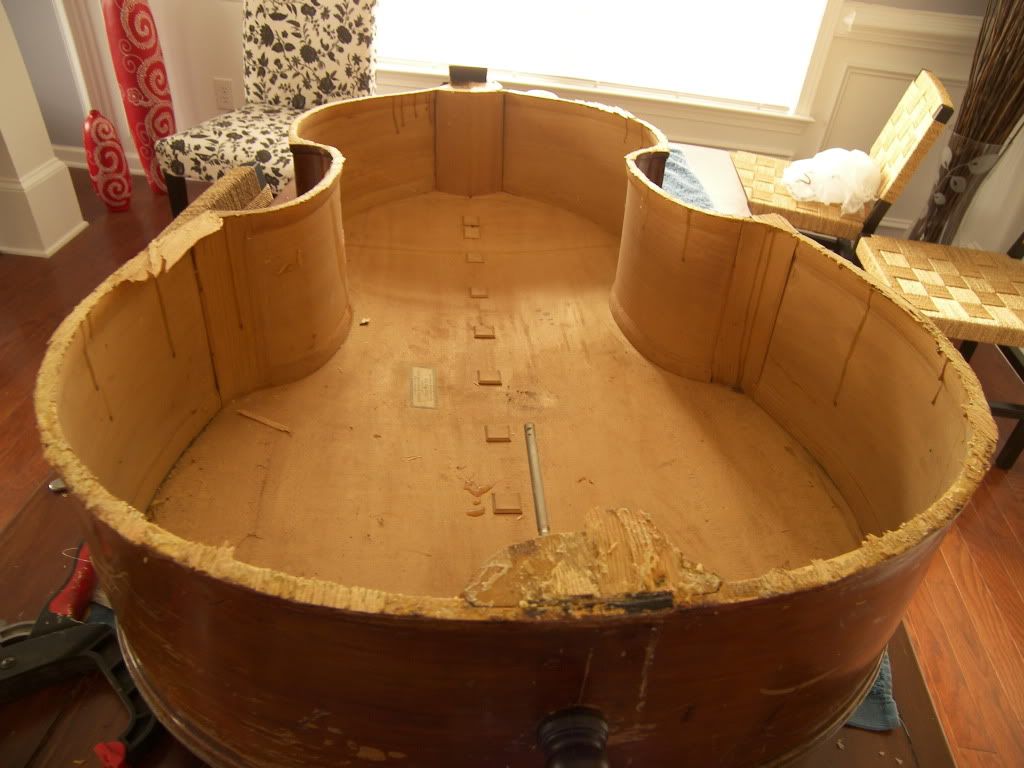  The Bottom Block : 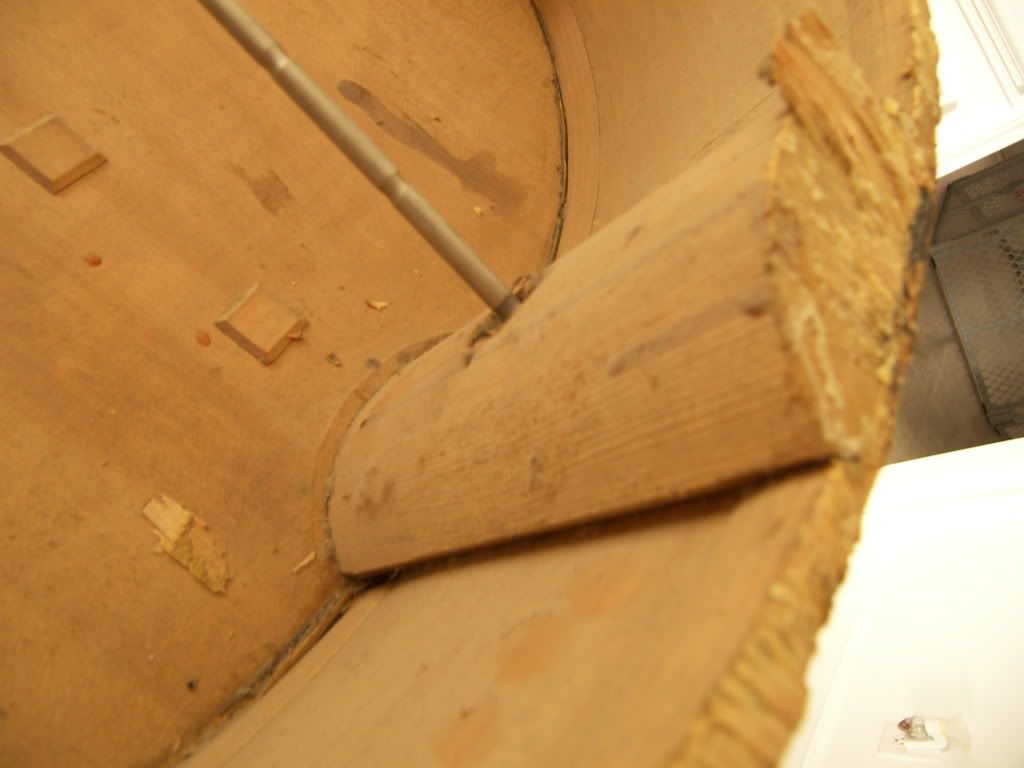 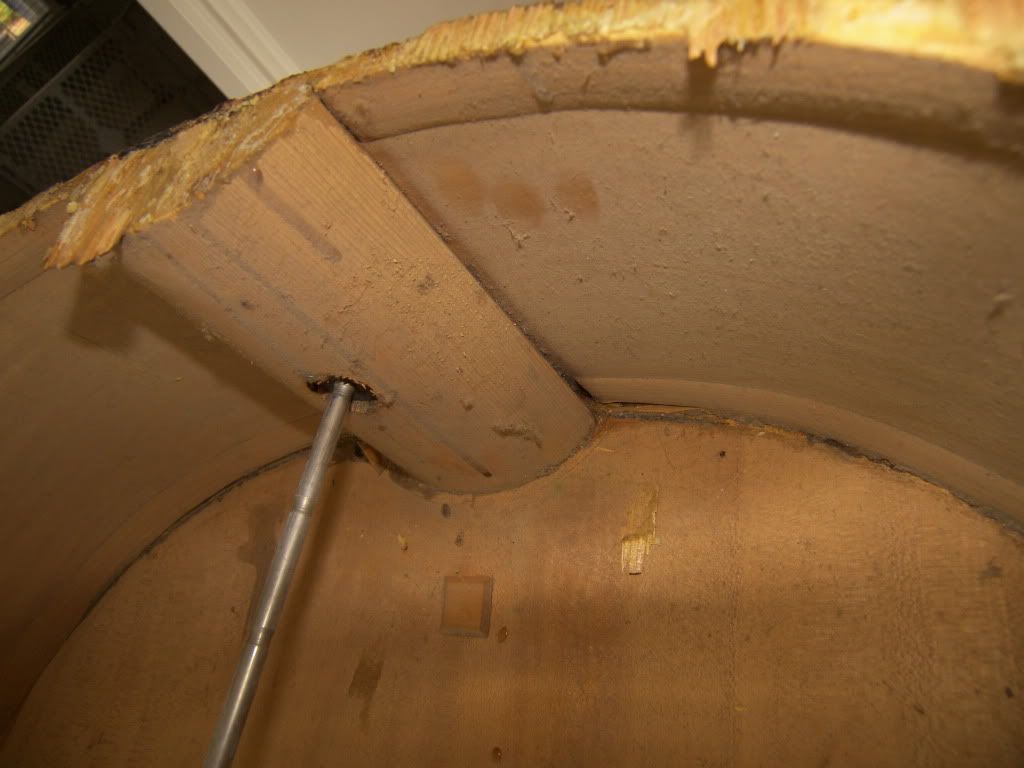 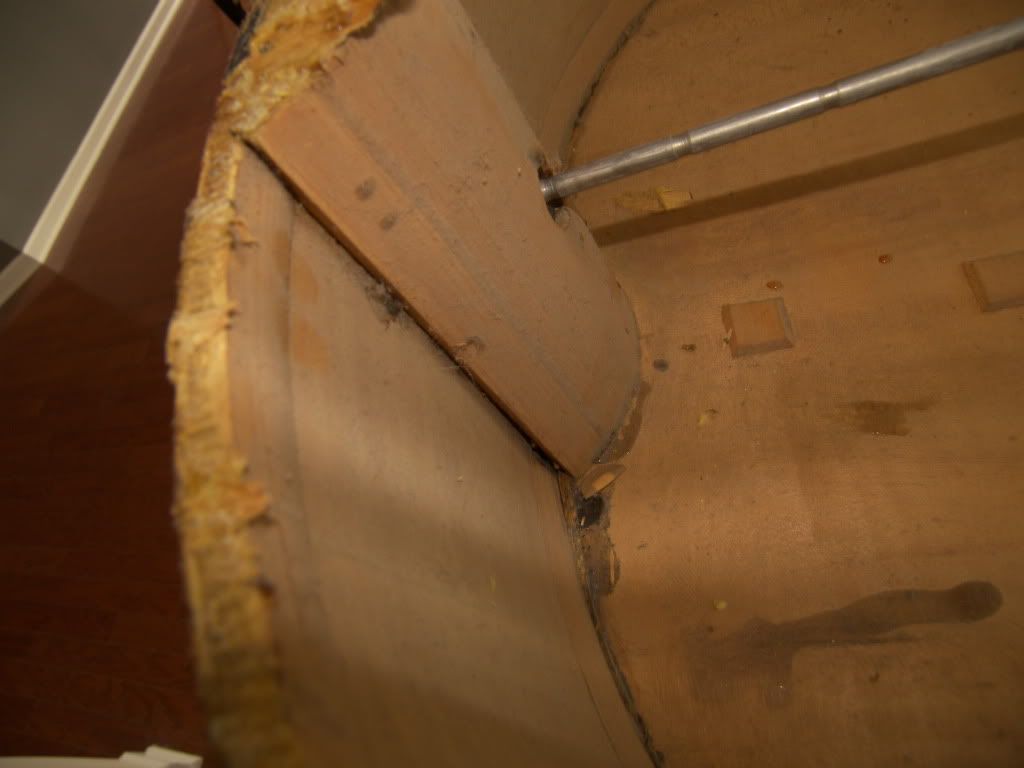 The Front repair: 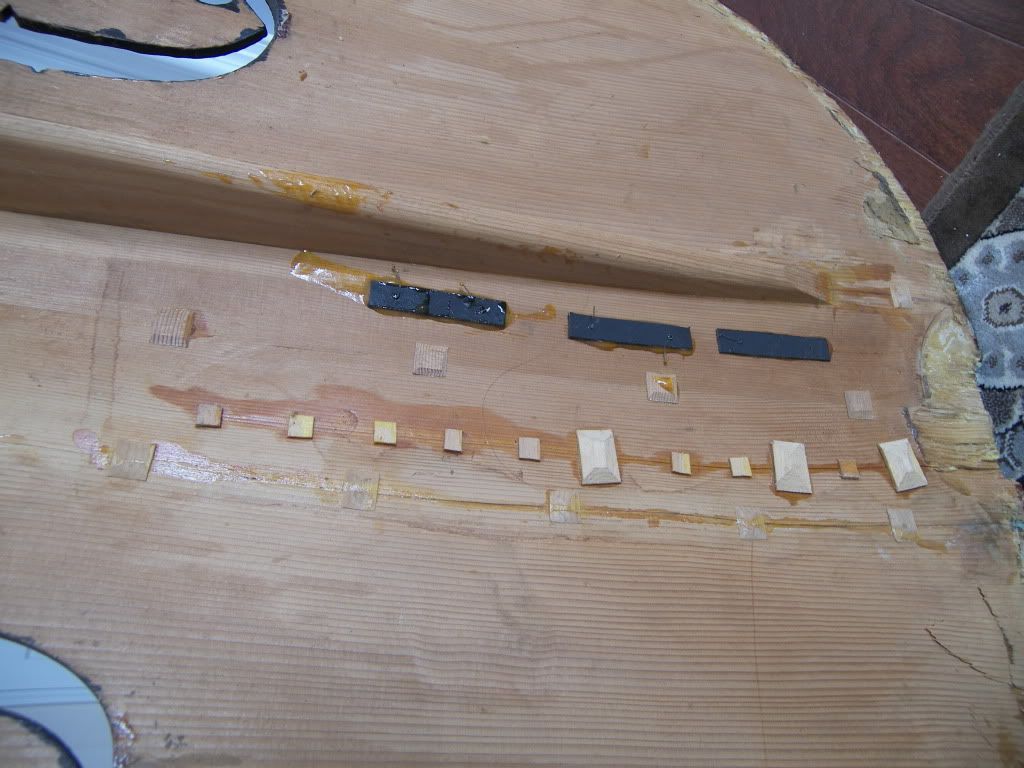 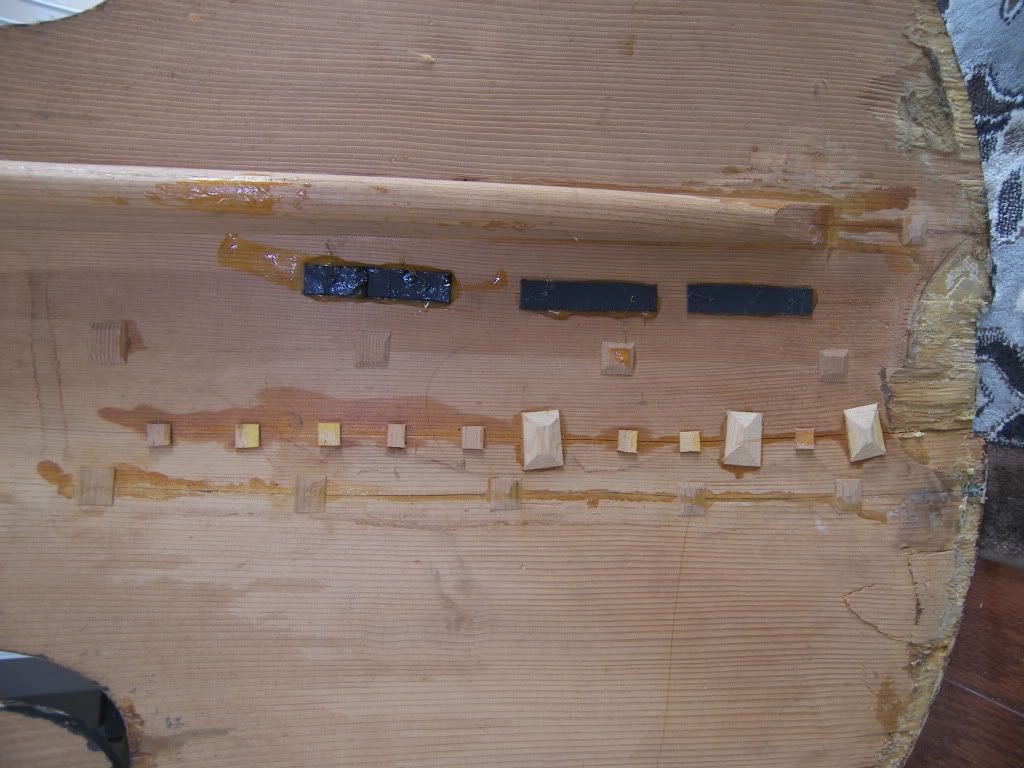  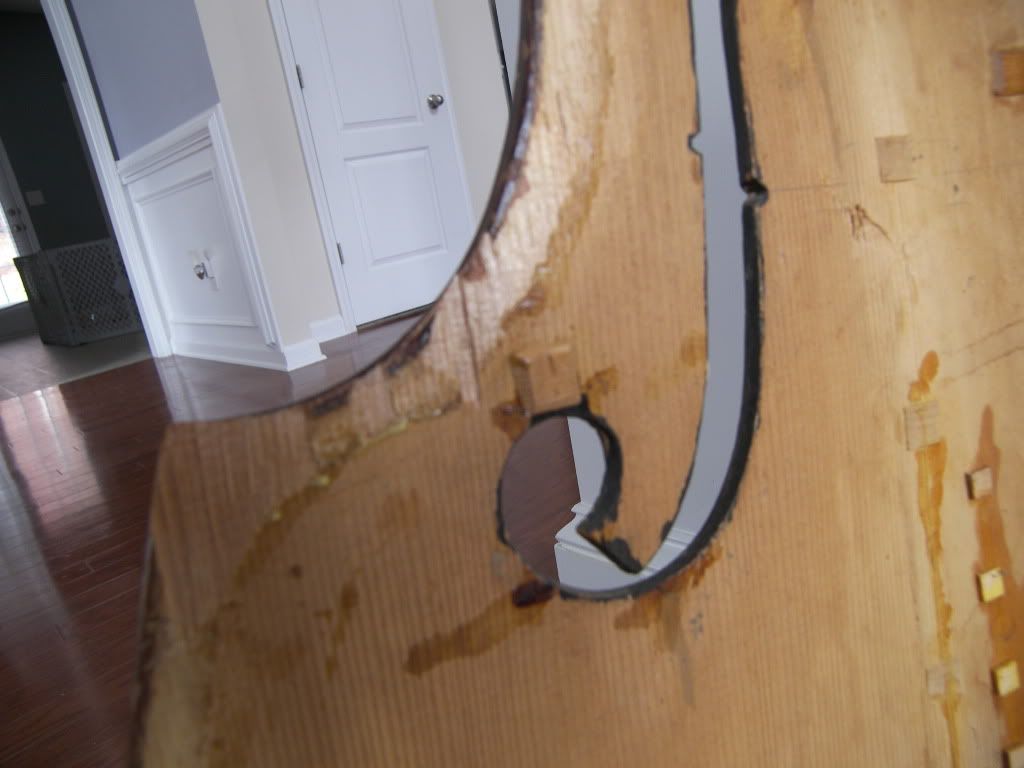
|
|
#5
11-22-2010, 09:51 AM
|
|||
|
|||
|
And the Crack:
 The patch: 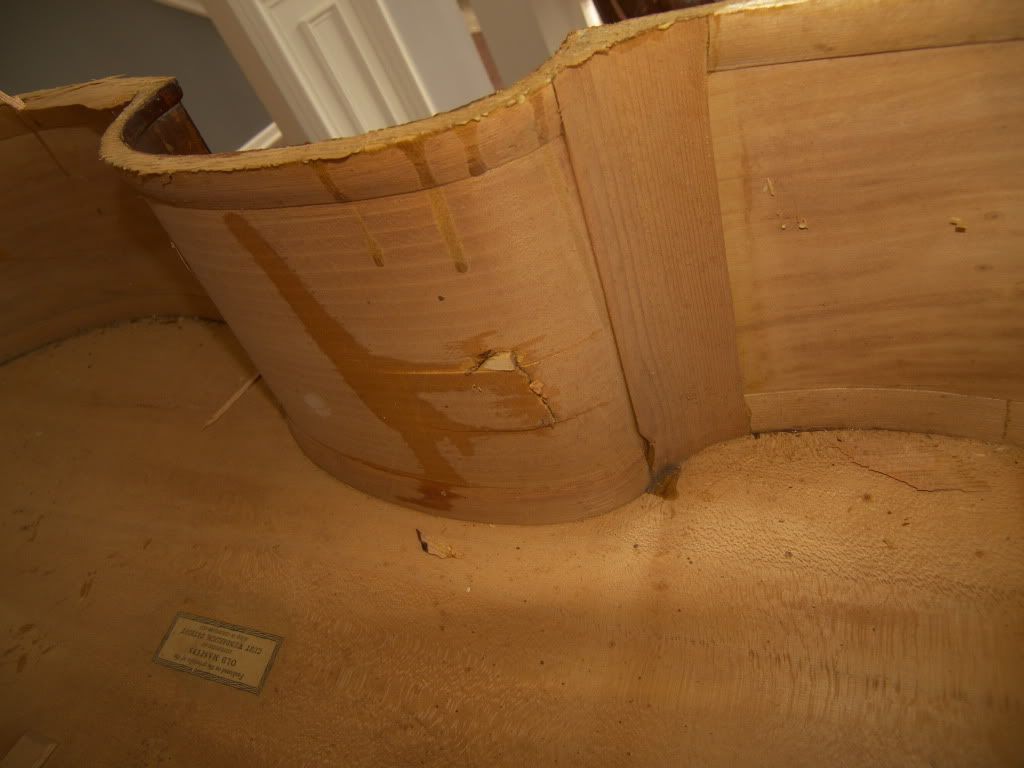
|
|
#6
11-22-2010, 09:53 AM
|
|||
|
|||
|
Quote:
|
|
#7
11-23-2010, 01:38 PM
|
|||
|
|||
|
Ruben, with all due respect, next time you remove a bass top please be more patient, and get some more advice about doing so less destructively.
|
|
#8
11-24-2010, 10:45 PM
|
|||
|
|||
|
Quote:
 . . I'm thinking now that I could used some heat or weaken the glue a little more....
|
|
#9
11-23-2010, 01:54 PM
|
||||
|
||||
|
Quote:
|
|
#10
01-20-2011, 08:48 PM
|
|||
|
|||
|
Well as Arnold suggested I am going to be using Diamond Cleats, the cleats are about 1" each side and 1/8" thick and also with the grain running about 45 degrees ...
I am using this time an bigger chisel as Mathew suggested, he say that it will be more fun this way I am going to be making few deep throat C clamps... as per Wayne Advise to use the right tool for the job (no lipstick sorry) and Taking all apart and do it again as Ken also recommend for me to do 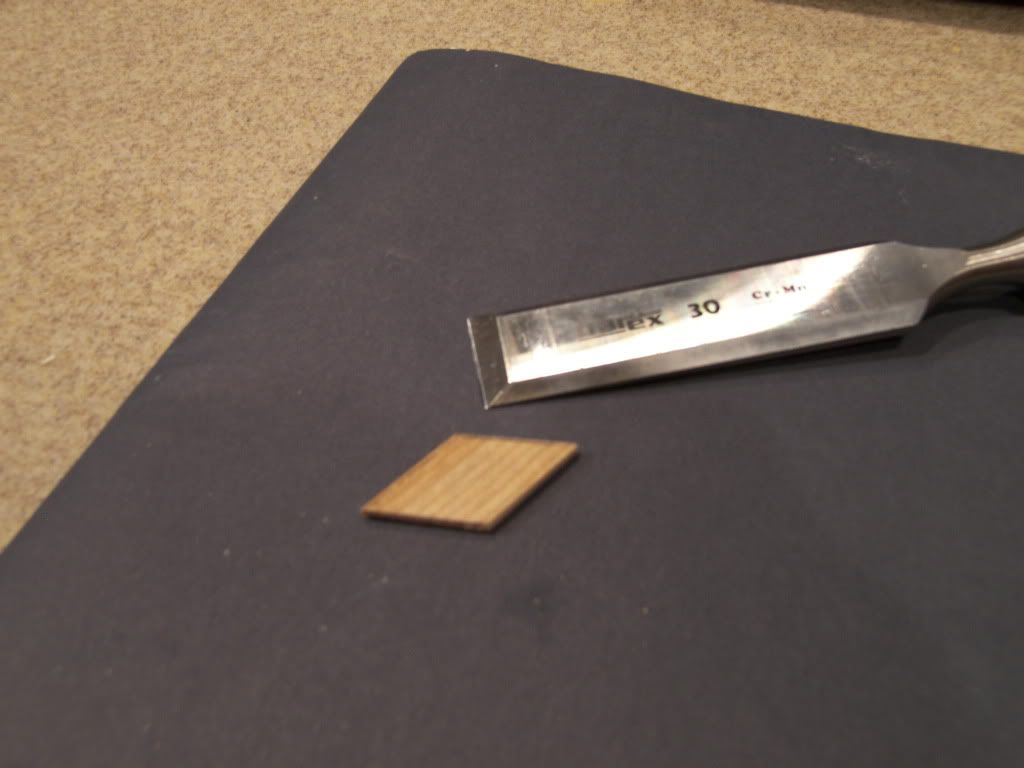 after making the clamps I am going to laid down the cleats but before I will send and picture for everybody to see what is going to be my plan 
|
|
#11
01-20-2011, 10:22 PM
|
||||
|
||||
|
Ha! And get that chisel sharpened

|
|
#12
01-20-2011, 10:27 PM
|
||||
|
||||
|
Quote:

|
|
#13
01-20-2011, 11:43 PM
|
||||
|
||||
|
Tell me about it ... just spent three hours with 80 grit trying to undo the damage I did to the back of a pristine HSS plane blade by putting it down, freshly lapped, on my bench overnight. If anything defines "the pits", that does
|
|
#14
01-21-2011, 08:38 AM
|
|||
|
|||
|
No no nooooo!!!.... I am good in that department, It doesn,t really show in the picture but that chisel its very sharp, I did spend yesterday more than an hour sharpening that chisel its deadly sharp
I start by flatting with 80 grip sand paper on a granite stone, then I move to 320g sand paper, and so on… Then I use my Veritas honing jig and register jig (Amazing little tool) for the bevel a 25 degrees again 80G, 320G, and tree diamond stones 320, 600, 1000. After that I use and 2000G sand paper and finally a leather belt for mirror finish…. When I done I do a 30 Degrees micro bevel… and I use the back on my The thumb nail to make sure its sharp… Also while I am working I am make sure stay sharp… by honing it with my leather belt… those chisels my be not the best chisels out there but they hold the bevel sharp as long I don’t mess with too much H. glue or little metal wires like the ones that I found on some of the patches in my DB PS it doesn’t give me you a lot of room for accidents 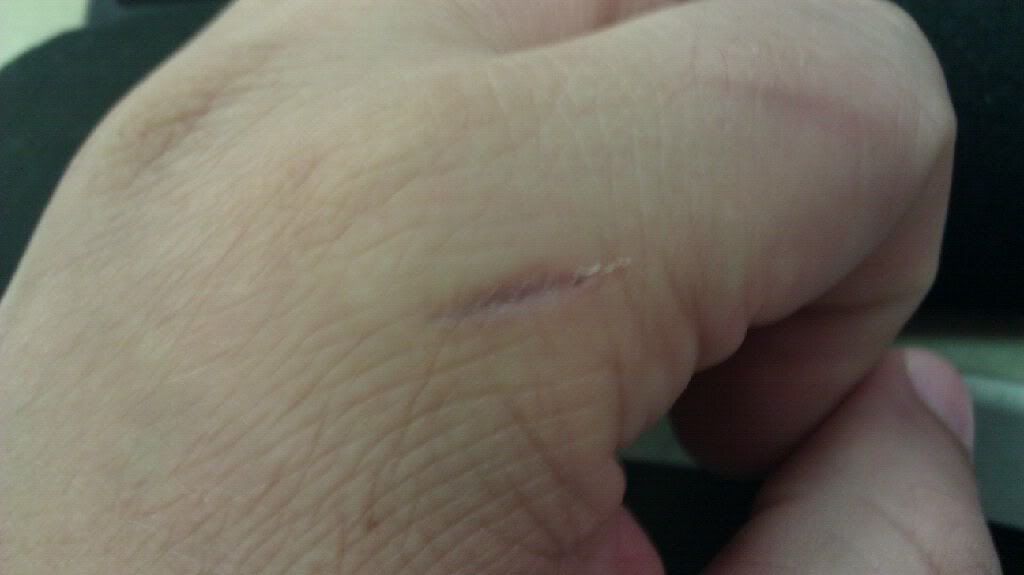
|
|
#15
01-21-2011, 09:52 AM
|
|||
|
|||
|
Quote:
Hi Wayne I guess the traditional way is chisel out the Cleat after Gluing… I don’t think that sanding before gluing it’s a bad idea… for now I am sticking to what I have seem (don’t want to be very creative).. I am going to tape around the cleats for sure, don’t want to nick the top… to be honest I did make few nicks the first time The hand its fine, it was a 10mm wound and it hit the bone.. Lots of blood and all that, I lost some tactile sensation on the skin of my finger, I got a none feeling in a good part of that finger right after the accident, like local local anesthesia feeling… I was tacking down the cleats and old hide glue from the top with the small chisel and guess what! my hand was on the way… and the chisel slipped….. Boom… work time was over Now I am very careful and aware where my fingers are all the time…
|
|
#16
01-21-2011, 03:56 PM
|
||||
|
||||
|
I guess I saw your microbevel and thought it was a burr ...
i think you'll find that no amount of tape will save the top from a sharp chisel. Better to be careful and use a slicing movement in an upward directon. You'll work it out. Your cleat looks fine to me.
|
|
#17
01-21-2011, 04:51 PM
|
||||
|
||||
|
I hate to derail the thread any further, but -
If you are stropping your chisels, the microbevels probably aren't worth the effort - but I haven't tried both (together) either. It just seems a bit counterintuitive (to me) to put a tiny little bevel on a blade and then polish it on a soft surface. But hey - whatever works!
|
|
#18
01-22-2011, 05:59 PM
|
|||
|
|||
|
Quote:
I got a good camera but not as good as yours I can really get cl ose details as your pictures... I guess you are into Photography too hum? Tape, I did save the top from few nicks last time, but u are right no tape is going to offer 100% against a sharp chisel, that is for sure. last but not least... yes I saw ur video shaving those cleats, u are using a totally different technique as I did, I was using downward force (not a great idea), u also cut with the flat part I was using the bevel part... the cleats closed to the bass bar are specially hard to shape (keep posting your restoration project it really helps a lot and more videos if thats posible )
|
|
#19
10-08-2010, 08:20 AM
|
|||
|
|||
|
Quote:
That's a wise advise, I really haven’t tried to find out a mentor... if u were a little closer I will stop by to bug u a little , but I can give u a call for advise, I really can use some.On the TB forum one guy suggest a similar approach, buy a beat up ply DB, made a carve top and replace it… that could be a good start, I will have the chance to see first hand how is build, I will do the setup… it may take me closer to a build, I may actually improve the instrument
|
|
#20
10-08-2010, 11:43 AM
|
|||
|
|||
|
[quote=wayne holmes;20553]
Quote:
|
 |
| Currently Active Users Viewing This Thread: 1 (0 members and 1 guests) | |
|
|


 Hybrid Mode
