|
#101
 01-24-2011, 09:33 AM
|
|||
|
|||
|
Good exchange, this weekend I made 4 deep c throat clamps… I am planning to build couple tools for the project, next will be a finger plane and then a caliper… not just to save some money but also I think is a good exercise… I will take some pictures soon

|
|
#102
02-12-2011, 02:44 PM
|
|||
|
|||
|
Well Guys this is my plan:
1) For laying of the cleats: They are spaced about 2" in between, no more than 2 1/4", PS I didn't care for the proper grain orientation of the cleats at this point is only for placement. 2) Also this is where I am planning the sound post patch to go... I am not doing the SP patch just yet, I need to make a couples tools for this job and then I am planing to practice this procedure in a piece of scrap wood first... 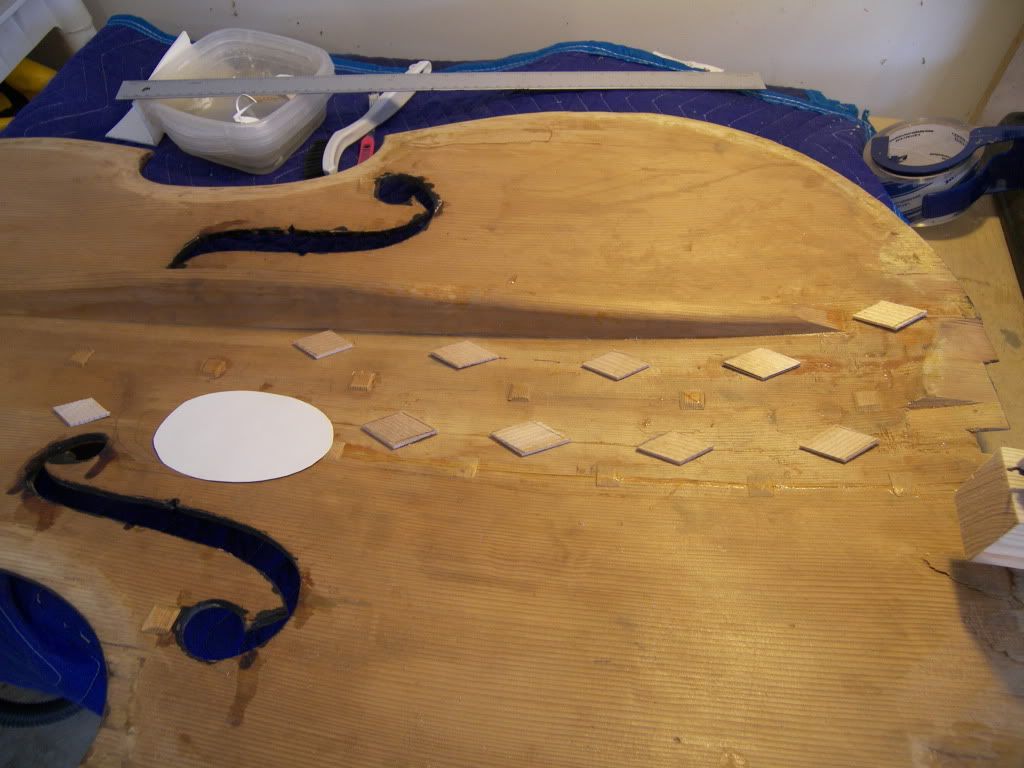 I am seeking for advise before I and clue this up... I can really use a series of steps sequence or methodology, and don't forget tips...  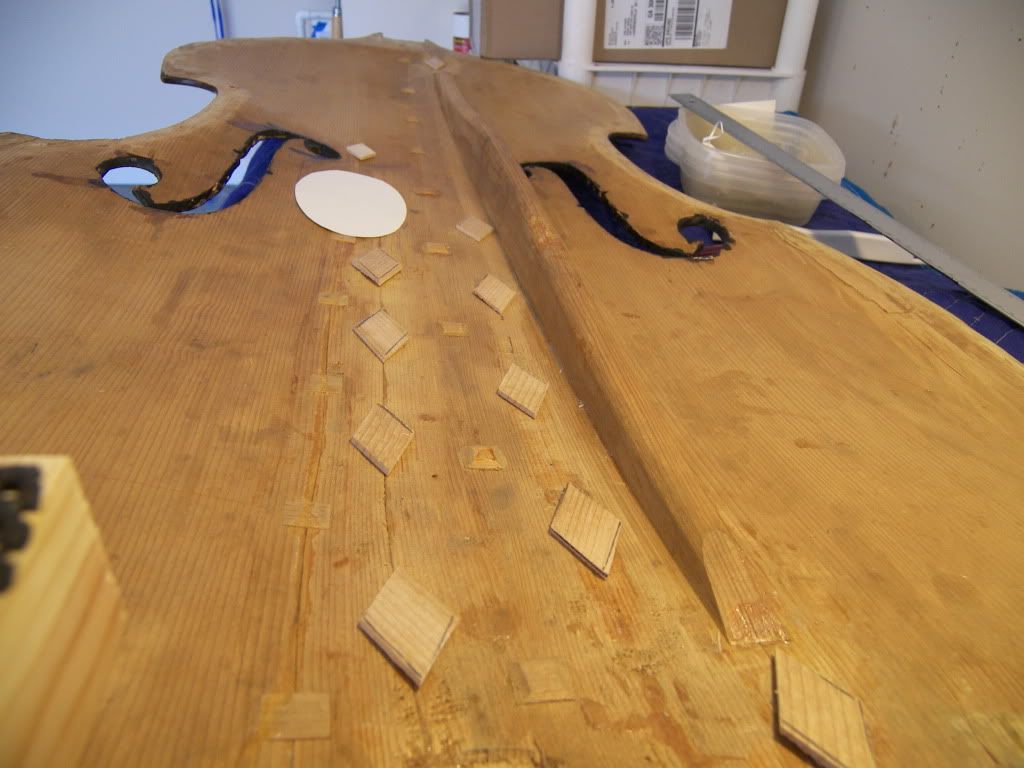 The tool, it isnt fancy but it will get the job done...!!! 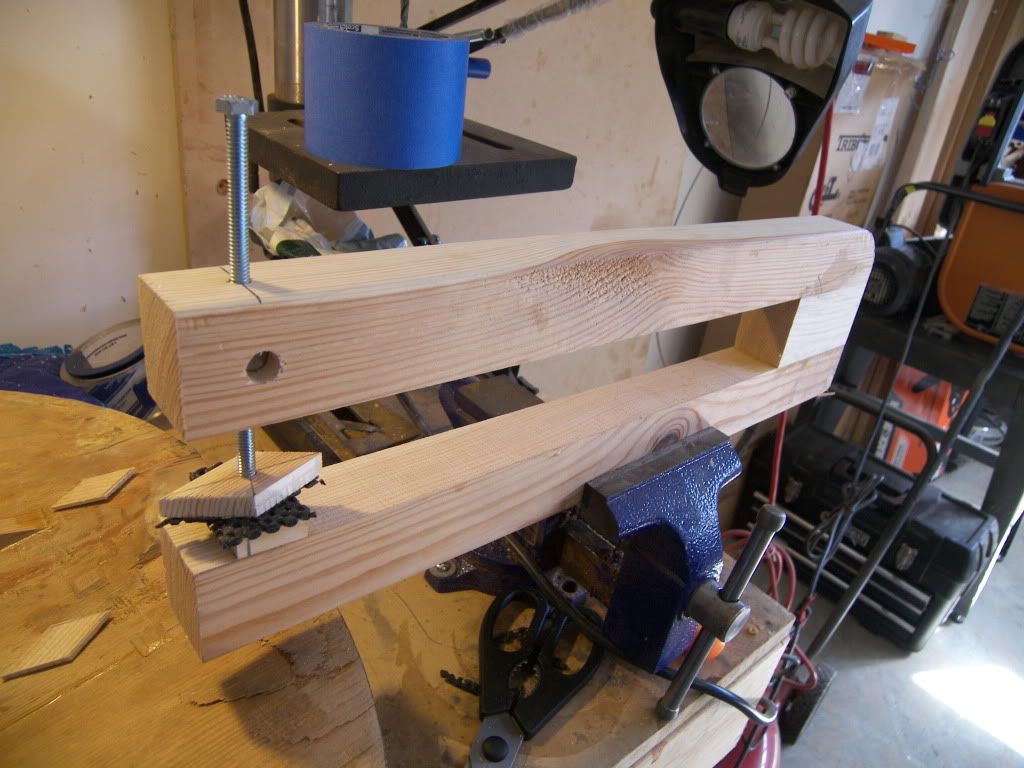 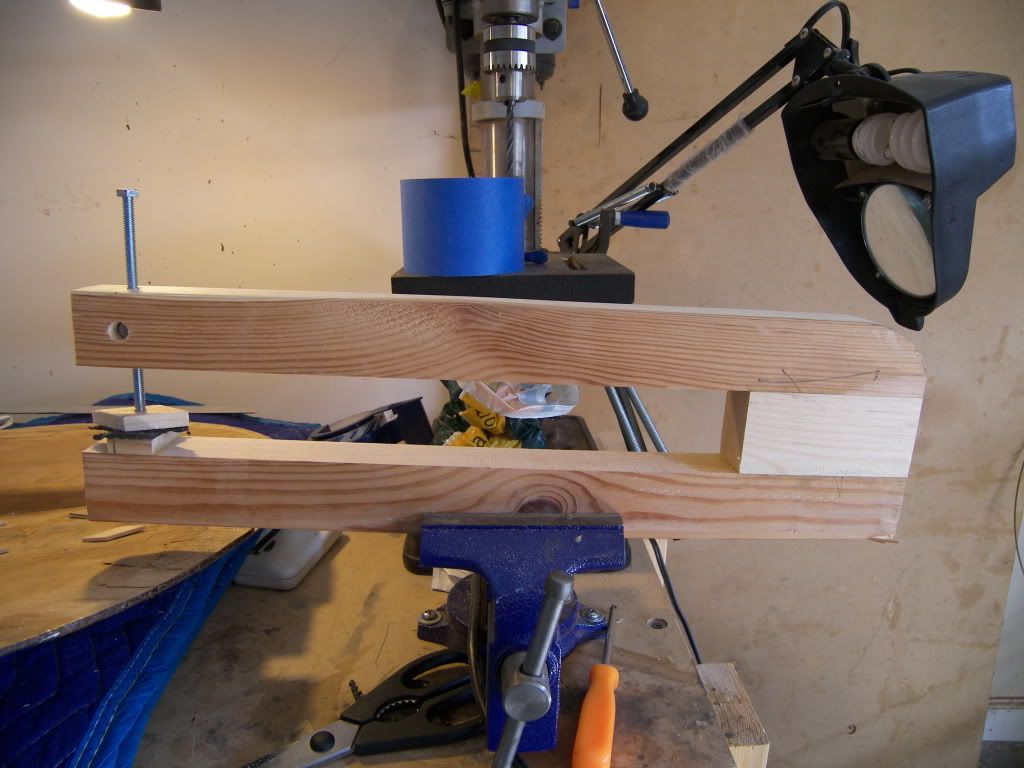
|
|
#103
02-12-2011, 05:03 PM
|
||||
|
||||
|
Ruben it looks like you're on the right track to me.
As far as sequence goes I would repair the bottom block areas and do the sound post patch first, then the cleats last. My tip: I often use small bags of lead shot as weights to clamp the cleats ... it does as good a job as a clamp and much easier.
|
|
#104
02-12-2011, 09:26 PM
|
|||
|
|||
|
Quote:
|
|
#105
02-13-2011, 11:00 PM
|
||||
|
||||
|
I think the cleats are insurance, not the main game. After fitting the post patch it's nice to be able to manoeuver a plane around that area without knocking into cleats. Same with the block repair. If all the cleats are fitted as laid out, it's going to be less fun trimming the block patch. I think.
Quote:

|
|
#106
02-14-2011, 02:04 AM
|
||||
|
||||
|
Quote:
The usual areas that sink are the lower Bassbar area, upper Bassbar area, center Bridge area and Soundpost area in that order from what I have seen. If just under the Bar at the bottom, it is possible that it was caused by a sprung-in Bar. The Bar itself when sprung in will not push out the Top in the center like some think because it is anchored against thinner graduated areas of the Top that are weaker. The sprung Bar will pull the top inwards at the ends and possibly split to top as well. I have had quite a few basses restored where the Top was partially or completely re-shaped so I have seen the process quite a few times. Last week I was up at Arnold's and saw the plaster mold outside behind the shop. I went to lift it and uhgggg, no way. It's a two man job. Arnold mentioned that each time he had to move the mold around with or without the Top in it he had his assistant help him move it.
__________________
Ken Smith ~ http://www.kensmithbasses.com http://www.kensmithbasses.com/doublebasses/ http://www.facebook.com/KenSmithBasses https://www.instagram.com/kensmithbasses/ https://www.facebook.com/ken.smith.904750 
|
|
#107
02-14-2011, 10:53 AM
|
|||
|
|||
|
Thank you for the feedback.... I got a question and this applies to SP patch and all...
I read that to get a good bounding you need to let the cleat sit on the top from one minute till the hide glue jell, and the using a hair dryer heat the glue again and then apply pressure to it... Or I should just apply pressure to the cleat as fast as I can and clamp with good pressure, not too much but firm.. Last edited by Ruben E garcia; 02-14-2011 at 02:17 PM.
|
|
#108
02-14-2011, 01:48 PM
|
|||
|
|||
|
Quote:
When you get ready to glue in your soundpost patch, make sure you size the wood of the bass top and the patch with thin hide glue, because there will be considerable end grain revealed. Without sizing, the glue will soak into the endgrain too much and the joint will eventually come apart. Also, if you are not using a counter form on the opposite side, you will need a lot of clamps, and you'll need to apply them quickly. Gluing down temporary cleats around the soundpost patch will keep it from sliding around when it's full of slippery glue.
|
|
#109
02-14-2011, 01:59 PM
|
|||
|
|||
|
I think the faster the better. Hot hide glue is strong as it work at a molecular level. If it create a bond it will fail, as the glue itself is brittle. So it's better not to let it jell, but to clamp fast and with a good pressure.
This way the extra not needed amount of glue will go out from the joint. If the glue jell too soon, maybe it is too thick, or the workshop is too cold. A good joint, as far as glue thickness and temperature go, is when the surfaces don't slip, after rubbing, even before they are clamped. Good luck, Ruben, you have a nice project there... oops, sorry Arnold, I was typing while you was answering... Last edited by Pino Cazzaniga; 02-14-2011 at 02:05 PM. Reason: Arnold said it better
|
|
#110
02-14-2011, 02:38 PM
|
|||
|
|||
|
Quote:
Yes I always though that too much pressure will squeeze the glue out…. Quote:
1. So I should apply thin coat of glue in both sides top and SP patch… 2. The counter form you mean by the front of the Bass top right? 3. Temp Cleats around the SP patch like the Mathew’s Restoration…
|
|
#111
02-14-2011, 02:40 PM
|
|||
|
|||
|
Quote:
|
|
#112
02-14-2011, 02:47 PM
|
|||
|
|||
|
Quote:
Well now seems like it’s a tough job… some people prefer to avoid to change the BB unless its 100% necessary… I can’t really tell if it need to be replace, because it’s too old or stiff… It does have a crack… that’s a bad sign… Now stupid question… can it be shorten a little and inlay patch the ends??? Or it will be an abomination of my sick mind???
|
|
#113
02-14-2011, 03:17 PM
|
||||
|
||||
|
Quote:
Carve out the bar and clean the bass since you might re-shape the top or not. You have the best view of that. Then repair the crack 100% after shaping top and then cleat it on top of the wood after fitting the bar along that surface but don't glue in bar. Then notch the fitted bar to go over the cleats and glue it down. Do not inlay the cleats as that will weaken the top. Everything should fit 100% with just finger pressure, no force. Then clamp to make a life long glue joint. All excess glue not needed will squeeze out. Don't be so scientific with the amount of glue. The grain of the wood, especially the end grain by far will suck in some glue. What it doesn't need, it spits out. One time a saddle lifted on me after a repair. The Block was new, sucked in a lot of glue and the ebony came loose from the tail wire pulling it. Re-gluing fixed it as I did it myself in my shop. That, I had time and tools for. The restoration I didn't.. 
__________________
Ken Smith ~ http://www.kensmithbasses.com http://www.kensmithbasses.com/doublebasses/ http://www.facebook.com/KenSmithBasses https://www.instagram.com/kensmithbasses/ https://www.facebook.com/ken.smith.904750
|
|
#114
02-14-2011, 04:13 PM
|
|||
|
|||
|
Quote:
Thank you Ken for the detail explanation I was thinking on inlay patch bellow the BB (worng), I need to read about a little more about the BB replacement, So I am looking at SP patch, bass bar, block edges and Edges repair, ah and also cleats… I am going to be busy for a while Ps I will let you guys know my plan in advantage just to be sure that I am in the right path
|
|
#115
02-15-2011, 06:30 PM
|
||||
|
||||
|
This thread has been cleaned up by deleting the last several off-topic posts and its relative replies.
Ruben, you have the floor..
__________________
Ken Smith ~ http://www.kensmithbasses.com http://www.kensmithbasses.com/doublebasses/ http://www.facebook.com/KenSmithBasses https://www.instagram.com/kensmithbasses/ https://www.facebook.com/ken.smith.904750
|
|
#116
02-16-2011, 02:11 PM
|
|||
|
|||
|
In others news, I am currently working on a Home made Caliper with a deep throat, I think I need this tool to make the SP patch and a little finger plane and some gauges…PSS Peace and Love
Last edited by Ruben E garcia; 02-16-2011 at 03:13 PM.
|
|
#117
03-01-2011, 04:37 PM
|
|||
|
|||
|
I am still working on the sound post patch, soon I will post some new pictures of my experiment, but for now I was looking for info about the patch online and I fond this info, I don’t really know is apply to an bass or a bass top I just though that I will be good to share it with you, it also have a second part..
|
|
#118
03-01-2011, 10:56 PM
|
||||
|
||||
|
I find it easier to cut the patch out first, then trace the outline onto the back. I find it is easier then to carve the bed for the patch, keeping the edges crisp and clean.
|
|
#119
03-02-2011, 11:30 AM
|
|||
|
|||
|
Quote:
|
|
#120
03-02-2011, 04:19 PM
|
||||
|
||||
|
Sure you can do that on a DB top. But whether you think its a good idea or not is up to you. Personally, I don't really understand why he chooses to do it that way, and its the only time I've ever seen it done that way. So unless I can get the genius behind it, i'll stick with what I know!
|
 |
| Currently Active Users Viewing This Thread: 5 (0 members and 5 guests) | |
| Thread Tools | |
| Display Modes | |
|
|


 Linear Mode

