|
#141
 08-09-2011, 07:55 PM
|
||||
|
||||
|
Cleaned up, clamped together and allow to dry
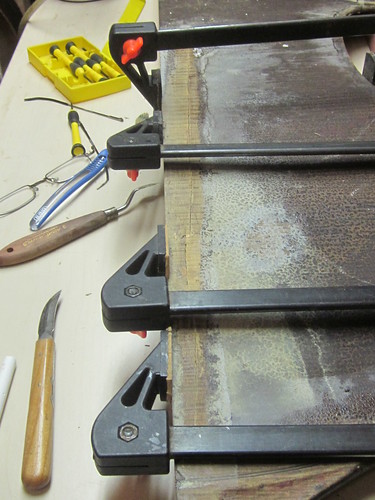 Not glued yet, but the crack seems to pull together OK  
|
|
#142
08-10-2011, 07:58 AM
|
||||
|
||||
|
Looks great; interesting to see what the original varnish has done over the years.
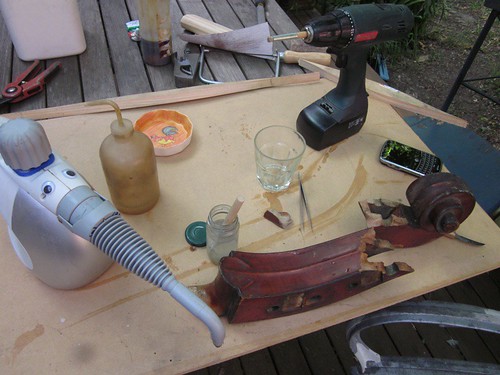
I'm curious what you're using as a steam source?
|
|
#143
08-10-2011, 08:43 AM
|
||||
|
||||
|
I get my steam from Womble. He now has an extension tube on his snozzle.
|
|
#144
08-10-2011, 12:54 PM
|
|||
|
|||
|
Glad to see you back at work on this massive job, Matthew. I've been anxious for you to get rolling again as I find this saga extremely fascinating-I've had a bass undergo major work a couple of times, and consider myself pretty knowledgeable for a non-luthier, but this sort of crack-by-crack documentation of a full restoration is an education for all of us, especially when it's done with so much care.
|
|
#145
08-10-2011, 06:33 PM
|
||||
|
||||
|
Quote:
However I spend a lot of time thinking about how to approach these sorts of tasks, and I think I'm getting OK results. Sometimes I wish I had someone to chat to about it though! Last edited by Matthew Tucker; 08-10-2011 at 07:36 PM.
|
|
#146
01-12-2012, 12:00 PM
|
|||
|
|||
|
Any updates, Matthew?
|
|
#147
01-12-2012, 06:04 PM
|
||||
|
||||
|
Steve, you keep me honest, don't you?
I have made a little progress on the button repair since last posting but nothing I want to post here yet. I want to make sure it works! Will get onto it soon. But I have four school basses in at the moment and have to get them out of the way by end of the month. By the way everyone I'm looking for recommendations for a small endpin model to replace the crap these small school basses are fitted with. I'd use an ULSA if given the choice, but school budgets creak a bit when I mention the price of these and there's a lot of reaming to do.
|
|
#148
01-17-2012, 06:09 AM
|
||||
|
||||
|
Hey Matthew,
I have had good luck with these for that exact purpose. Good value for the school basses. http://www.ebay.com/itm/5-PCS-3-4-4-...item3a56d1ec7f Hope that helps, Brian
|
|
#149
01-19-2012, 11:07 PM
|
||||
|
||||
|
thanks Brian they look quite solid.
On this occasion, the schools agreed to pay for the ULSA pins.
|
|
#150
02-13-2012, 12:04 AM
|
||||
|
||||
|
Small update. Remember how I had tacked the back halves to a frame to help re-align them?
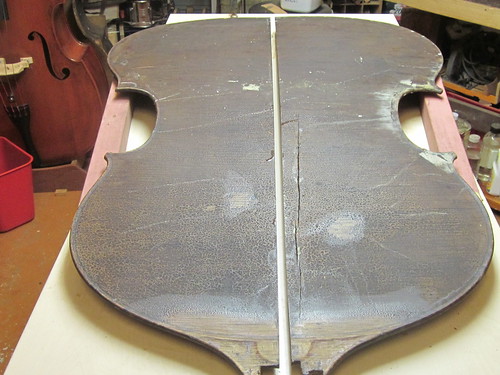 Well, once they were separated, the halves twisted about like so many pringles and try as I might, I found it was impossible to re-align them nicely. But I have learned a thing or two about the process! So I have now decided to start from square one, back to flat plates as the builder would have done, re-join them, possibly with a 1-2mm centre strip if necessary, then re-brace with a slight dish across the plates, and then re-bend the break. For the moment, I've been using heat, sandbags and pressure to flatten the plates on a formica worktop. Its very humid here in Sydney at the moment - almost tropical - midsummer and warm, sticky with bucketing rainstorms and hail. the end of La Nina apparently. So not glueing weather or varnishing weather, but flattening seems to be going OK. this stage is not very picturesque, but I'll post pics if you want. (edit: here are pics of flattening. It will take a while. I'm using a heat blanket to flatten each plate zone by zone.) 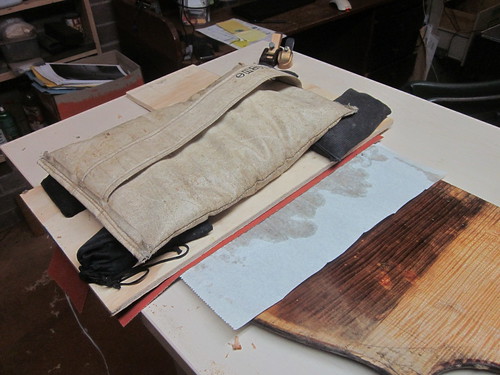 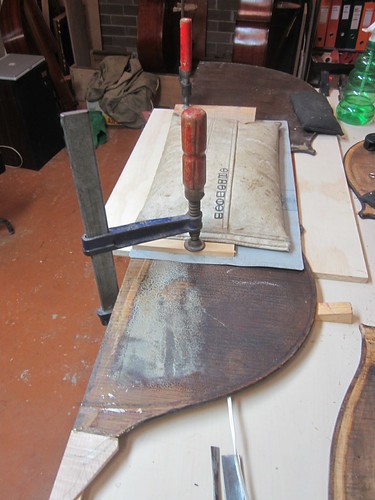 After the assembly has cooled down, there is still a bunch of moisture left in the wood that can't escape through the silicone blanket, so i clamp the whole plate flat under a frame overnight or longer. 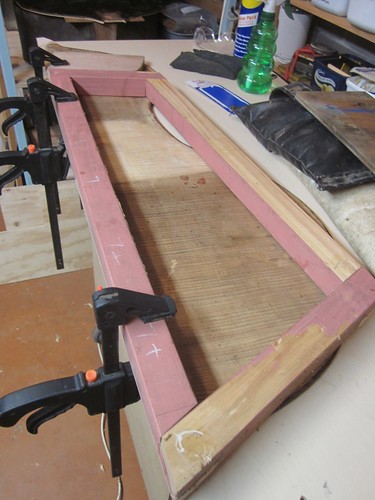 Last edited by Matthew Tucker; 02-14-2012 at 09:45 PM.
|
|
#151
02-13-2012, 11:06 AM
|
|||
|
|||
|
Speaking for myself, I enjoy every picture. I can't imagine being a bassist and not finding this account of a total restoration fascinating-I look forward to every installment, and feel like I'm learning a lot.
|
|
#152
02-14-2012, 09:55 PM
|
||||
|
||||
|
OK So I just made an executive decision that I am not going to stand for this crappy spirit varnish remnant any longer.
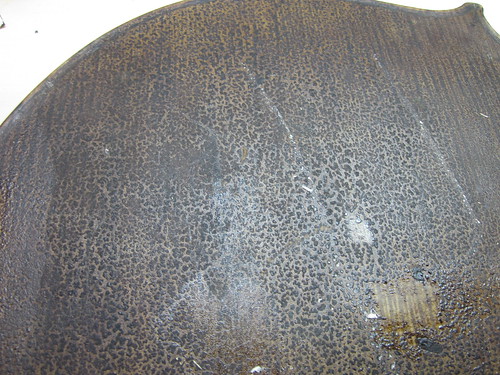 It crumbles, it melts and sticks to the bench, it gets into everything ... enough is enough! No more pussyfooting around - this bass is going to be stripped and refinished! Starting NOW.   Before: 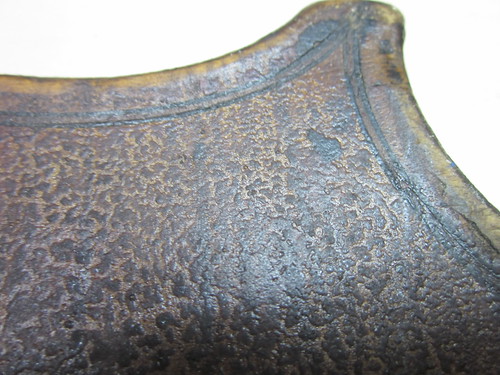 AFTER:  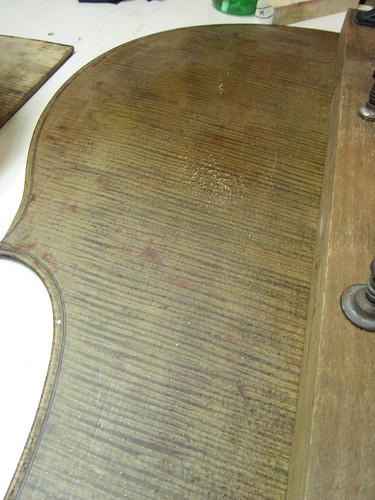 This will make my restoration work SO much easier. I should have done this a long time ago. Underneath the crap you can see patches of the original colour. And a whole lot of dings, cracks and other damage ... 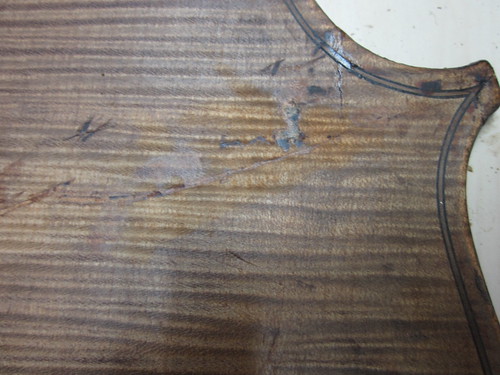  But the wood underneath is rather special. And it's nice to see the hand of the maker at last!
|
|
#153
02-15-2012, 03:38 PM
|
|||
|
|||
|
Gack-that looked like crude oil on the plastic scraper-the wood is really beautiful. It's gonna be spectacular with a new finish.
|
|
#154
02-17-2012, 03:14 AM
|
|||
|
|||
|
Seeing this restoration is really inspiring. Can't wait to see how it comes together...
|
|
#155
02-17-2012, 03:52 AM
|
||||
|
||||
|
Quote:
|
|
#156
02-17-2012, 07:59 AM
|
||||
|
||||
|
OK remember this?
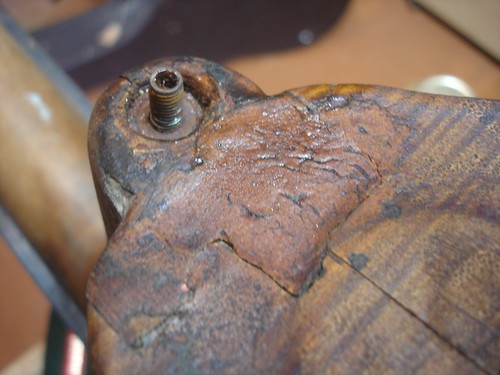   Most of the button was destroyed and filled with wood putty, bolts and stuff. So I cut it off and trimmed each half plate at a suitable grain line, leaving as much original wood as possible.
|
|
#157
02-17-2012, 08:10 AM
|
||||
|
||||
|
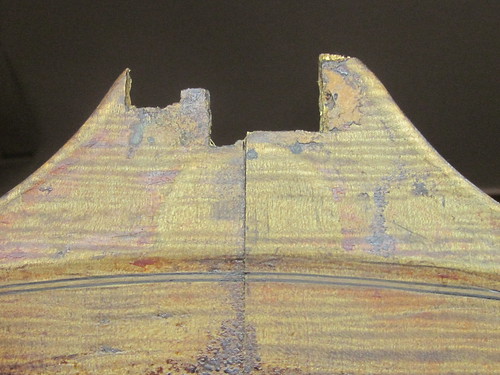
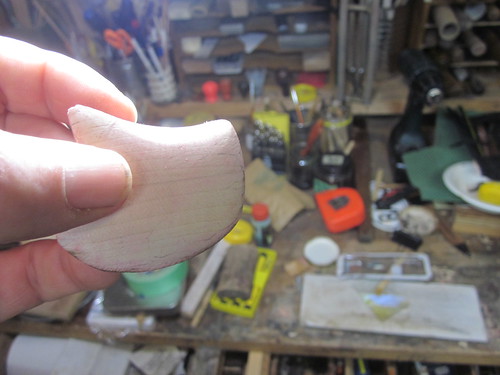
(This is a wee bit out of sequence with some of the pics I posted recently - you may if you have keen eyes notice that I did the first part of what comes next, a little while ago)
After quite a bit of hunting around and eventually a friendly donation from Ken McKay I obtained some highly flamed maple close to the original. 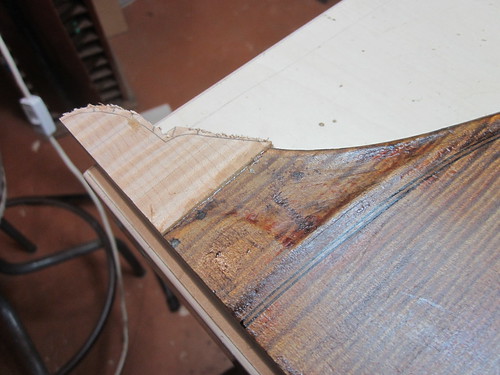 Of course, this is brand new wood; it wood (!) have been better to find some old flamed maple but there's precious little of this over here. I probably should have "aged" the wood first before fitting, but I'm counting on being able to match it under the varnish later. I think a butt-join isn't enough here; although the hide glue joint is very strong, this place needs some long maple fibres running across the joint, so I plane the end down at an angle to put the maximum new wood in place with the minimum join showing at the plate edge. Most of the NEW wood runs along the centre seam, and feathers out towards the edge of the repair. 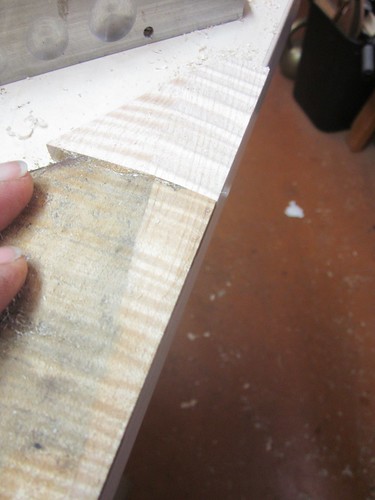  I don't need to use such fancy maple for this piece, but the grain will still be running almost the same way.   My new Veritas low angle block plane has been brilliant for this job. 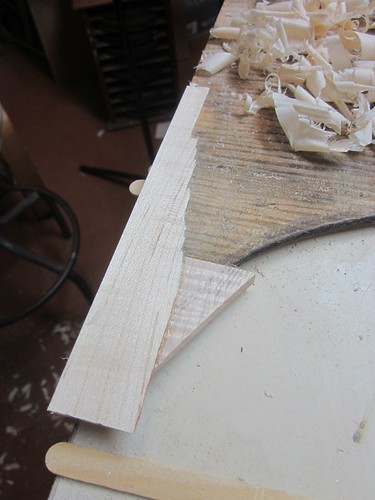  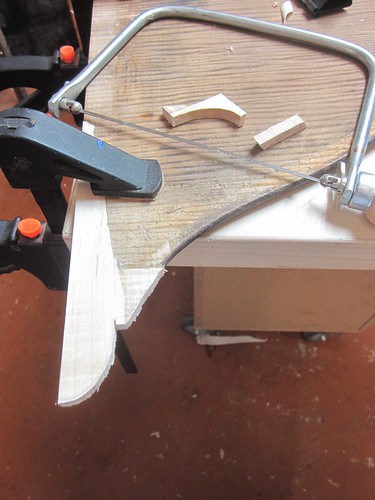 Here's the edge of the off-cut and you can see how good the joint is. I have planed off almost all the way through the plate at the centreline, but angled back up to the edge of the plate so that the join will only be visible on the edge of the button itself, not the plate edge. 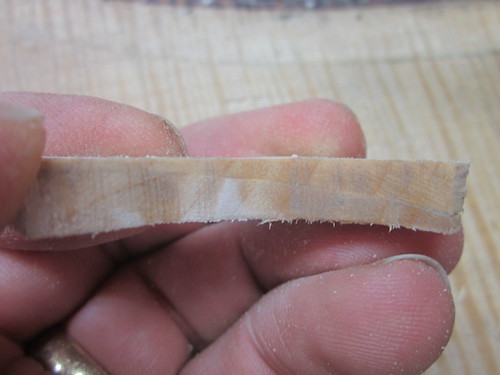 Well that's enough for now. I'll trim these more and blend the outside with the french-style button later when the plate is re-jointed and probably re-glued to the block! Last edited by Matthew Tucker; 02-19-2012 at 09:19 PM.
|
|
#158
02-17-2012, 09:33 AM
|
||||
|
||||
|
Nice grain matching...thanks for sharing all of this!
|
|
#159
02-20-2012, 06:43 PM
|
||||
|
||||
|
A damaged corner. The wood was a bit spongy and torn as a result of several top removals/replacements in the past. One way of patching this would be to plane a flat shelf right across the edge and fit a flat piece, then cut and reshape the edge. But the edge was clean, and I wanted to preserve it. So I decided to do a fitted inlay patch. This is more work but will lead to a better result, I think.
 Starting the bed. You can see the cracks and splits! 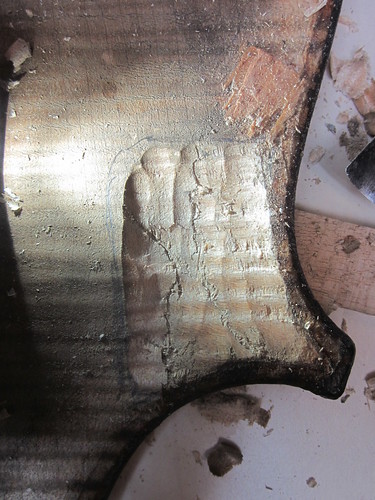 The maple patch piece with alignment marks.  Rough shaping the bottom of the patch. This is going to be more time consuming than fitting a sound post patch; maple is much harder than spruce.  Checking depth and shape of the bed. I make it perfectly smooth and polished and keep the edges as clean as I can. 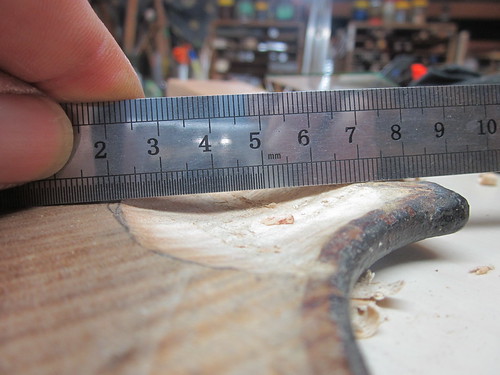 Chalking the bed  Trimming the patch with a scraper 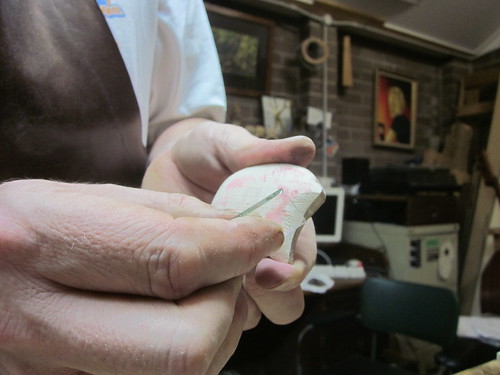 Checking the fit – a fair way to go yet. The surfaces need to fit perfectly in all dimensions. 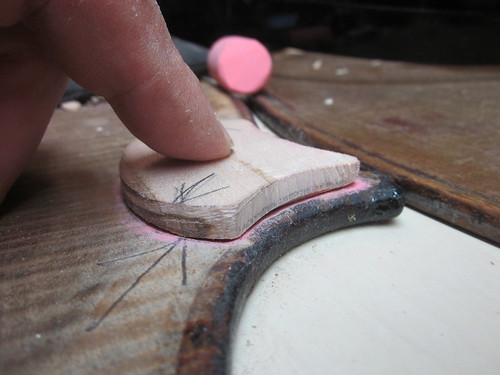
|
|
#160
02-20-2012, 06:45 PM
|
||||
|
||||
|
The finished patch
 Ready for gluing.  The glued and trimmed patch – you can see a thin layer of spalting that showed up when I planed it down, but it is of no consequence  I'm happy with the result 
|
 |
| Currently Active Users Viewing This Thread: 48 (0 members and 48 guests) | |
| Thread Tools | |
| Display Modes | |
|
|


 Linear Mode

