|
|
|
#1
 02-17-2012, 04:14 AM
|
|||
|
|||
|
Seeing this restoration is really inspiring. Can't wait to see how it comes together...

|
|
#2
02-17-2012, 04:52 AM
|
||||
|
||||
|
Quote:
|
|
#3
02-17-2012, 08:59 AM
|
||||
|
||||
|
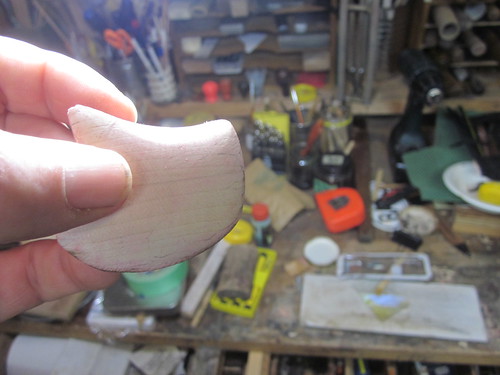
OK remember this?
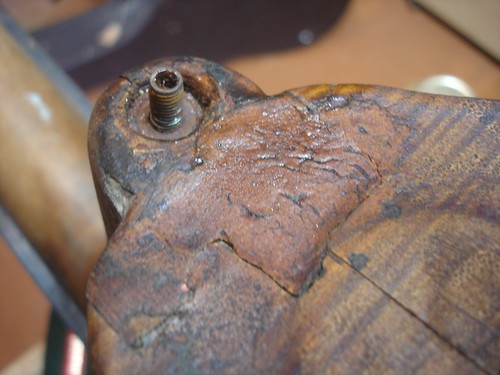  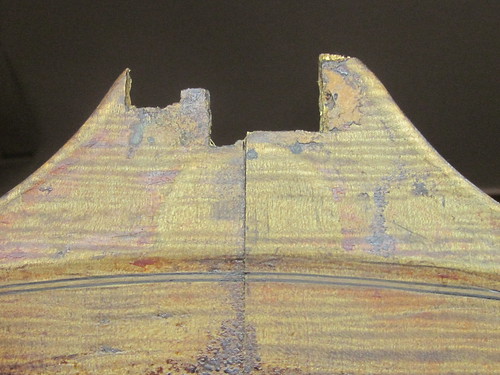 Most of the button was destroyed and filled with wood putty, bolts and stuff. So I cut it off and trimmed each half plate at a suitable grain line, leaving as much original wood as possible.
|
|
#4
02-17-2012, 09:10 AM
|
||||
|
||||
|
(This is a wee bit out of sequence with some of the pics I posted recently - you may if you have keen eyes notice that I did the first part of what comes next, a little while ago)
After quite a bit of hunting around and eventually a friendly donation from Ken McKay I obtained some highly flamed maple close to the original. 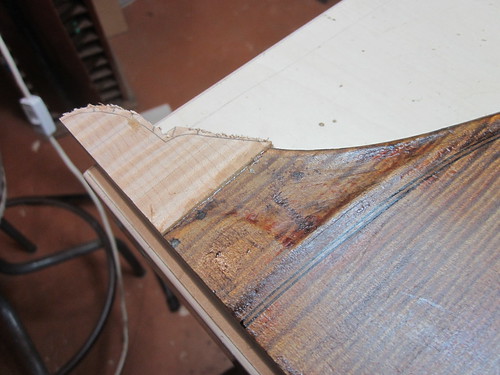 Of course, this is brand new wood; it wood (!) have been better to find some old flamed maple but there's precious little of this over here. I probably should have "aged" the wood first before fitting, but I'm counting on being able to match it under the varnish later. I think a butt-join isn't enough here; although the hide glue joint is very strong, this place needs some long maple fibres running across the joint, so I plane the end down at an angle to put the maximum new wood in place with the minimum join showing at the plate edge. Most of the NEW wood runs along the centre seam, and feathers out towards the edge of the repair. 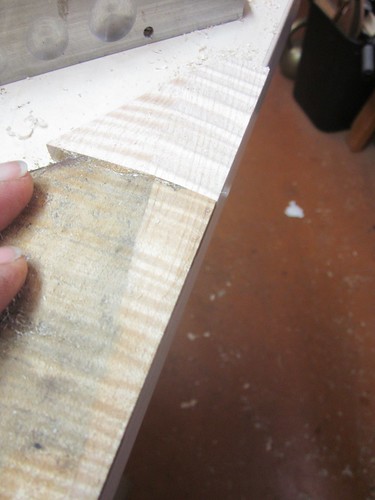  I don't need to use such fancy maple for this piece, but the grain will still be running almost the same way.   My new Veritas low angle block plane has been brilliant for this job. 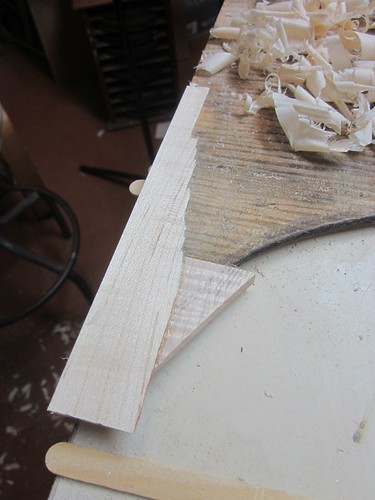  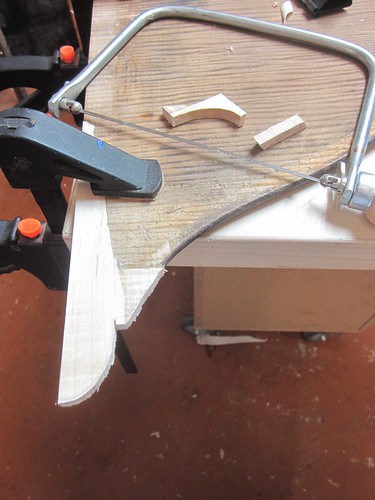 Here's the edge of the off-cut and you can see how good the joint is. I have planed off almost all the way through the plate at the centreline, but angled back up to the edge of the plate so that the join will only be visible on the edge of the button itself, not the plate edge. 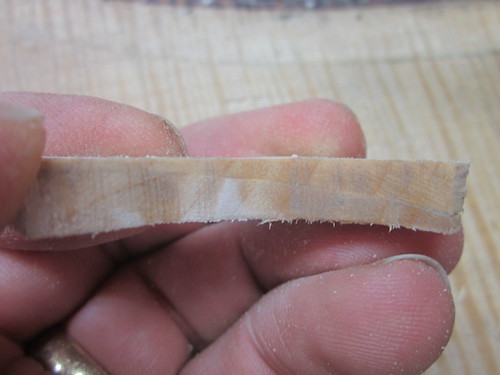 Well that's enough for now. I'll trim these more and blend the outside with the french-style button later when the plate is re-jointed and probably re-glued to the block! Last edited by Matthew Tucker; 02-19-2012 at 10:19 PM.
|
|
#5
02-17-2012, 10:33 AM
|
||||
|
||||
|
Nice grain matching...thanks for sharing all of this!
|
|
#6
02-20-2012, 07:43 PM
|
||||
|
||||
|
A damaged corner. The wood was a bit spongy and torn as a result of several top removals/replacements in the past. One way of patching this would be to plane a flat shelf right across the edge and fit a flat piece, then cut and reshape the edge. But the edge was clean, and I wanted to preserve it. So I decided to do a fitted inlay patch. This is more work but will lead to a better result, I think.
 Starting the bed. You can see the cracks and splits! 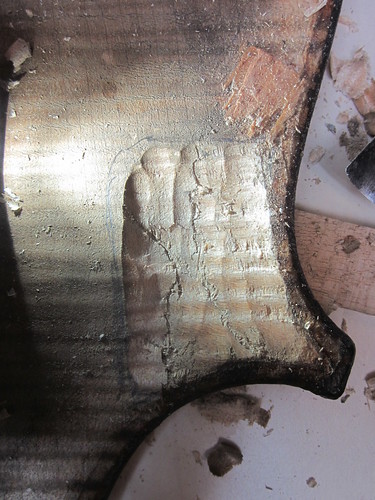 The maple patch piece with alignment marks.  Rough shaping the bottom of the patch. This is going to be more time consuming than fitting a sound post patch; maple is much harder than spruce. 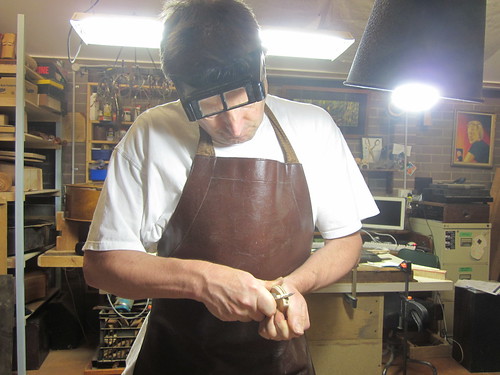 Checking depth and shape of the bed. I make it perfectly smooth and polished and keep the edges as clean as I can. 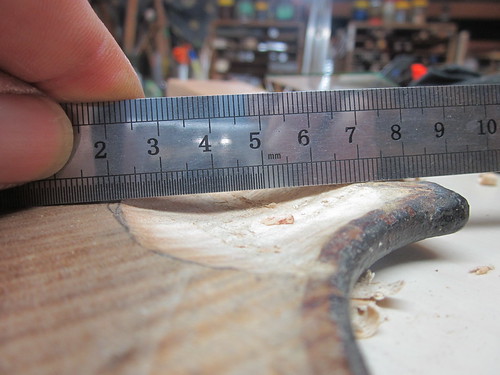 Chalking the bed  Trimming the patch with a scraper 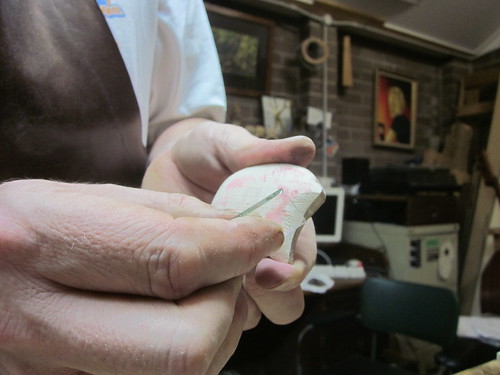 Checking the fit – a fair way to go yet. The surfaces need to fit perfectly in all dimensions. 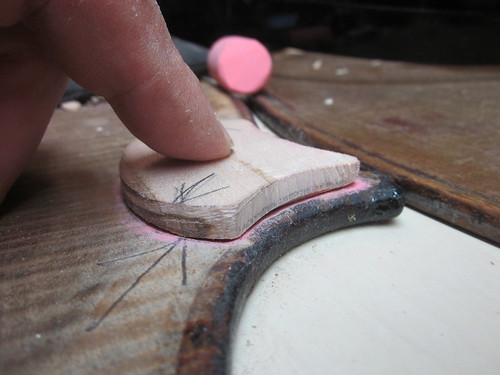
|
|
#7
02-20-2012, 07:45 PM
|
||||
|
||||
|
The finished patch
 Ready for gluing.  The glued and trimmed patch – you can see a thin layer of spalting that showed up when I planed it down, but it is of no consequence  I'm happy with the result 
|
|
#8
02-22-2012, 04:55 PM
|
||||
|
||||
|
Quote:
__________________
Ken Smith ~ http://www.kensmithbasses.com http://www.kensmithbasses.com/doublebasses/ http://www.facebook.com/KenSmithBasses https://www.instagram.com/kensmithbasses/ https://www.facebook.com/ken.smith.904750 
|
 |
| Currently Active Users Viewing This Thread: 57 (0 members and 57 guests) | |
| Thread Tools | |
| Display Modes | |
|
|


 Hybrid Mode
