|
|
|
#1
 05-07-2010, 01:51 AM
|
||||
|
||||
|
Here’s the first look inside. Filthy dirty so I vacuumed out the crud and had a close look all over, but I can’t find any makers marks, or stamps. Perhaps when I do a proper cleanup something may appear, but I doubt it.
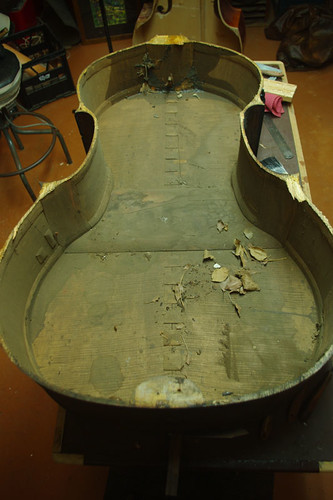 Inside the top block – can see splits, and yes, a failed dowel repair PLUS a coach-bolt PLUS a whole load of black resinous stuff, probably resorcinol or something like that. 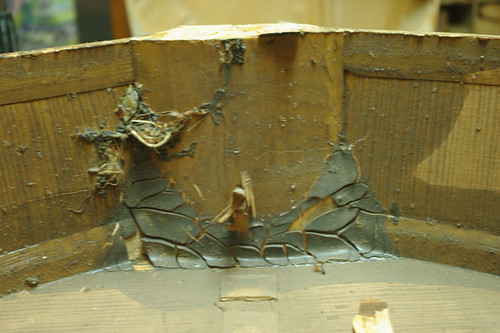 Some successful repairs. Look at how thick the C bout linings are on the right hand side! They are really well made, and the centre brace sits very snugly up against them. 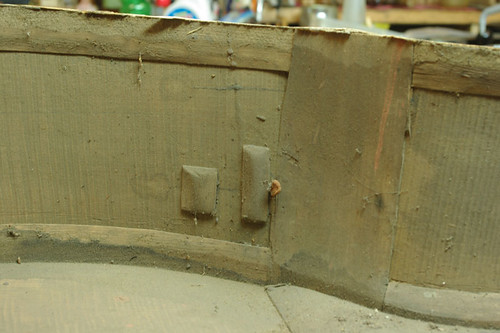 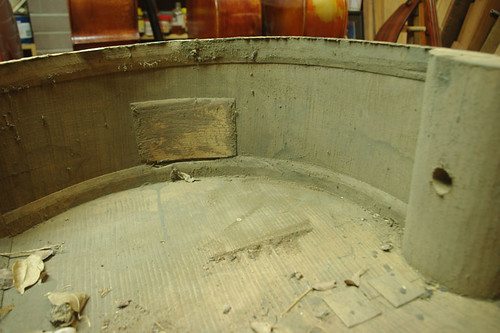 And some failed ones that I’ll have to redo. But look at how smooth and well-made the blocks are! 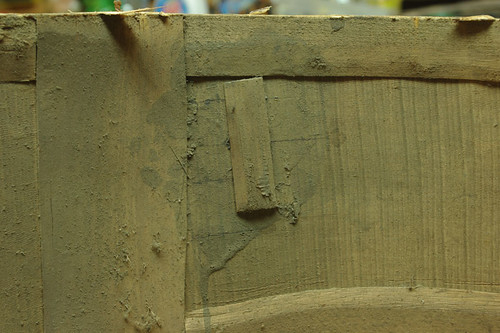 These were put in from through the FF holes I think. 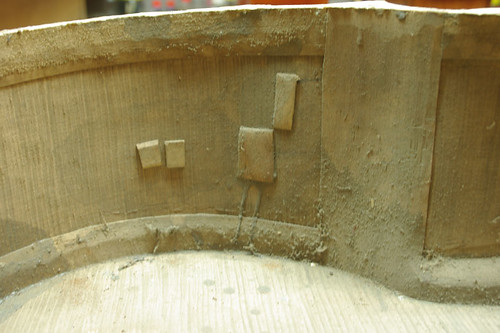 The mortise still has the back of the heel firmly attached. I’m not going to worry too much about this as I have to replace the whole block anyway. 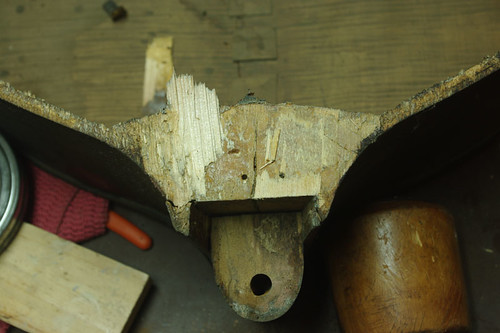 Altogether, this heel had one wooden dowel from back of heel diagonally down into the block, which obviously failed, and which was followed by a coachbolt through the same hole and down into the block at another angle. I reckon THIS is what split the block. Then another dowel through from front to back, (probably through the button) which obviously failed, so this was followed by a threaded rod right through from button through to the rustic fingerboard! Last edited by Matthew Tucker; 05-07-2010 at 03:41 AM. 
|
|
#2
05-07-2010, 02:59 AM
|
||||
|
||||
|
Amazing looking wood on that bass. The Flame is outstanding.
__________________
Ken Smith ~ http://www.kensmithbasses.com http://www.kensmithbasses.com/doublebasses/ http://www.facebook.com/KenSmithBasses https://www.instagram.com/kensmithbasses/ https://www.facebook.com/ken.smith.904750 
|
|
#3
05-07-2010, 09:48 AM
|
|||
|
|||
|
On most of those, the C-bout back linings are bandsawn poplar or beech. They are extremely wide, the theory being that this would help prevent seam openings. It does work, but we all know that's a bad idea for a couple reasons. You will want to replace those with normal linings. And you might consider a different back bracing scheme. The old "stair step" is reviled for making these basses sound thin and respond slowly. No sleep for you in the year ahead!
|
|
#4
05-07-2010, 10:11 AM
|
||||
|
||||
|
Yes well my instinct was to change that single brace to a more "italian" style of cross bracing. I was also wondering whether by doing so the "integrity" of the "french" bass would be compromised. But this is not a museum piece, has no makers label, and is being restored to play.
That's interesting what you say about the bandsawn linings - I was wondering how on earth you could BEND a 12mm strip around that sort of radius! I'm inclined to leave the other linings as they are, though ... I can't see much to be gained by lightening them. Arnold the stop length is 570mm. What does that tell you? Last edited by Matthew Tucker; 05-07-2010 at 10:27 AM.
|
|
#5
05-07-2010, 12:08 PM
|
||||
|
||||
|
Quote:
The Linings should all be replaced. The larger linings inside stiffen the ribs and hinder vibration. Label or no Label put a normal center Brace and a lower and upper brace as well. I think 3 braces are fine regardless of pedigree. My Mougenot has the same single brace and it's coming out and most likely just what I told you for braces. If you like, my bass will be done before this one and I can tell you what was done, if you like. Ok? ok..
__________________
Ken Smith ~ http://www.kensmithbasses.com http://www.kensmithbasses.com/doublebasses/ http://www.facebook.com/KenSmithBasses https://www.instagram.com/kensmithbasses/ https://www.facebook.com/ken.smith.904750
|
|
#6
05-07-2010, 04:56 PM
|
|||
|
|||
|
Matthew, since you are on the other side of the planet you should have taken the back off first, oh well too late now.
  Fine looking bass there! Good luck with her. To carve the back brace out it shouldn't be to difficult. You might be able to get some controlled splitting and remove the big chunks first, then once down to a bit thinner, you can plane it or keep using a sharp thin headed gouge, finger planes and then wet the last slivers with a damp cloth to remove the splinters and clean the glue off.
|
|
#7
05-08-2010, 10:12 AM
|
|||
|
|||
|
Looks like a nice project Matthew. Give it your best!
|
 |
| Currently Active Users Viewing This Thread: 23 (0 members and 23 guests) | |
|
|


 Hybrid Mode
