|
#1
 05-06-2010, 12:24 AM
|
||||
|
||||
|
Here’s an interesting project for me. Customer brought in this nice old flatback bass, found in an attic.
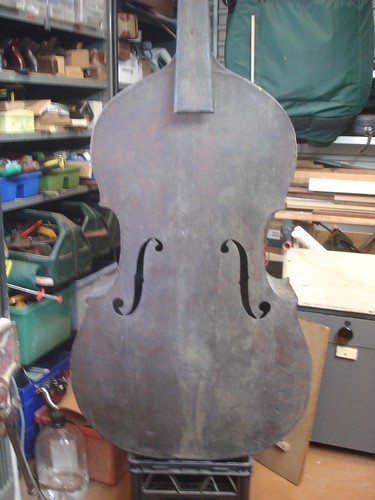 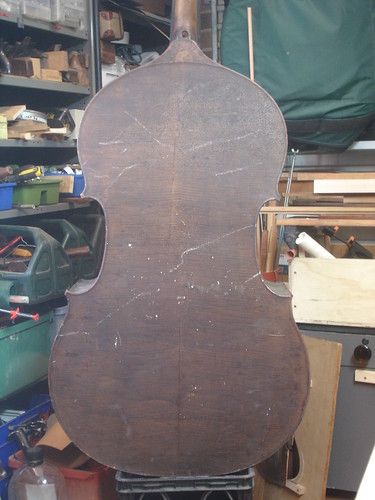 The button carving below, and the outline to me appears typical of French basses from the mid-late 1800's. The ugly bolt is NOT typical! This one has no immediately apparent makers mark or label. I'm thinking something like a Lamy Mirecourt bass. Any maker suggestions? 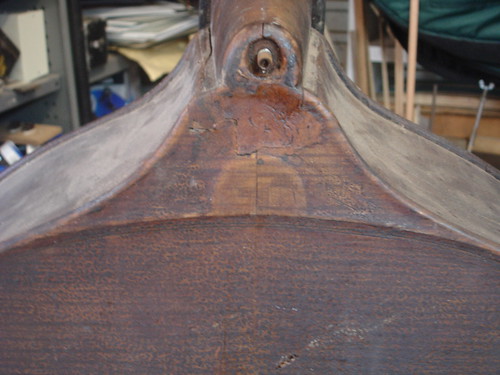 The Scroll has snapped off just below the nut and this will mean a scroll graft repair for sure. 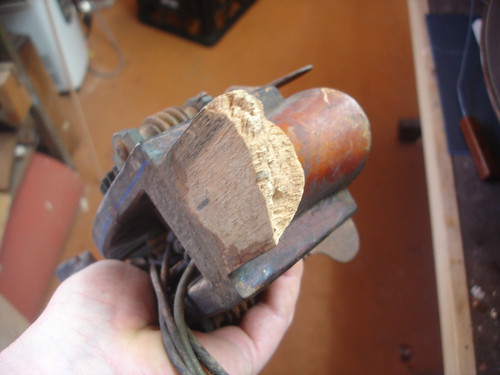 Nice big scroll, looks original, four pegs and a very crusty set of gut strings. This was never a three-stringer. Also the volute has been broken off above the top tuner at some point and repaired but not in a very satisfactory way. 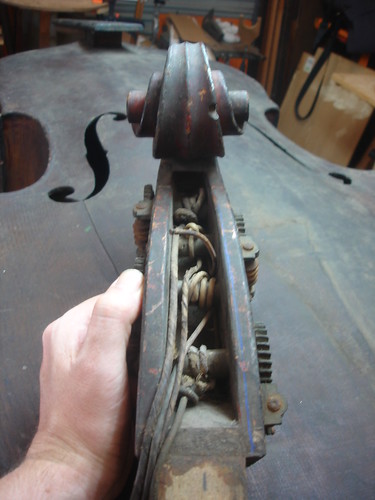  The Scroll gives an idea of the original red-brown varnish which on the rest of the instrument has deteriorated into a pobbly mess. I suspect it was a spirit varnish because of the brittleness of what is remaining, but the heat of the attic has shrunken and denatured whatever was there originally. There are a few spots on the top where the colour shows through. The wood is lovely. I think the ground is intact and I may be able to keep this by carefully scraping the crud off the surface then cleaning, when it’s time to refinish. That’s a long way off yet. 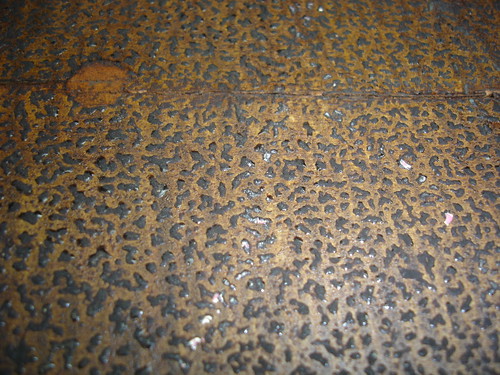 There are about ten cracks in the top ranging from these long ones to the usual short cracks near the FF tabs. And a nasty sound post crack that will come together OK but require an inlaid patch. The top arching is not sunken in any way; it looks perfectly fine, perhaps due to a thickish top. I'll get the graduations off it when I have it apart. 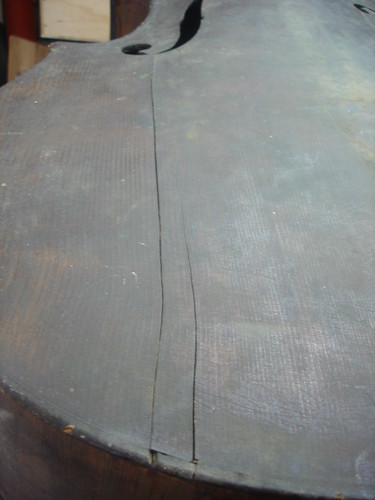 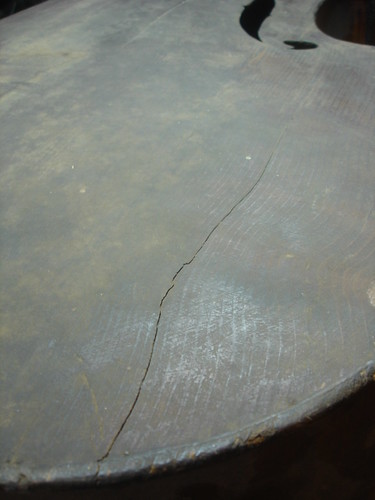 Corners are worn but repairable. This is the worst one. 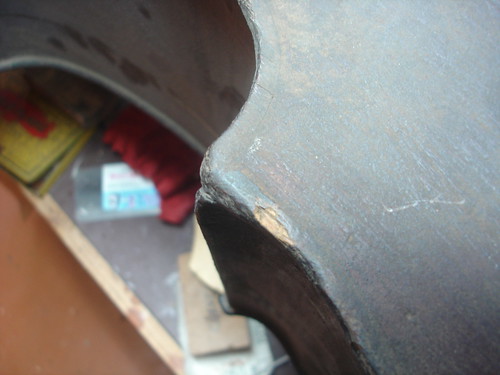 Last edited by Matthew Tucker; 05-06-2010 at 04:41 AM. 
|
|
#2
05-06-2010, 12:25 AM
|
||||
|
||||
|
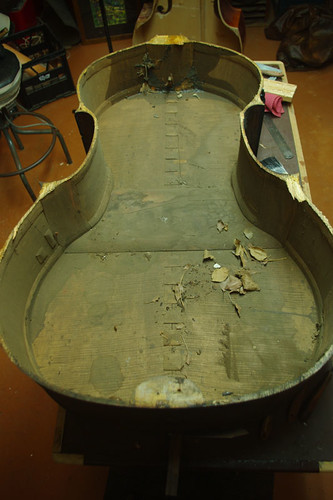
Inside the top block looks like a bit of a mess, and I think I can see a dowel AND a coachbolt and a split.
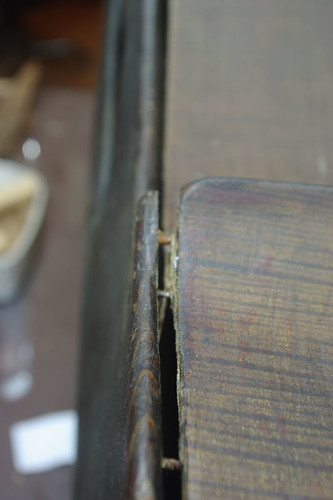
Bass bar is intact and attached. 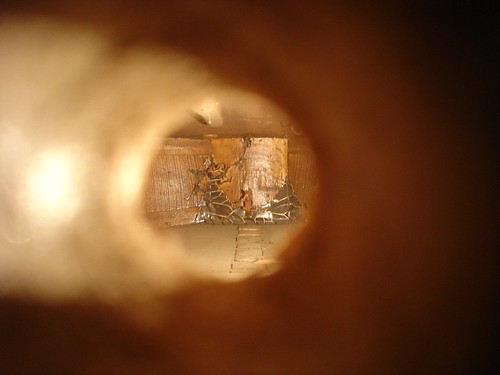 The single wide centre brace is typical of French basses but has split in several places and will likely need to be replaced. Not looking forward to that one. The back seam has shrunken and there is one crack as shown but other than that the back is in good condition. 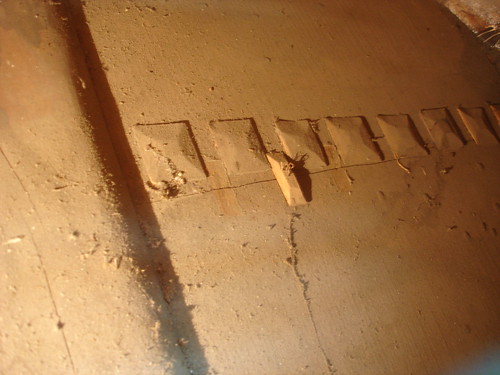 First evidence of home repairs – a weird flat fingerboard held on with a bolt. And some pine blocks underneath, nailed in :-( 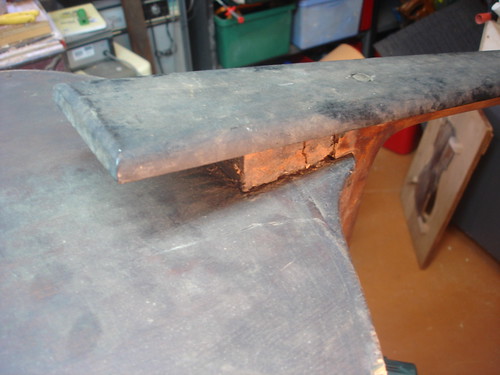 Neck heel badly damaged, evidence of both professional and home repairs. You can see evidence of a dowel plug on the right near the button. 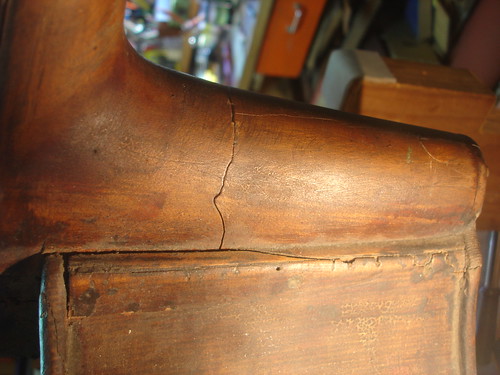 The ribs have numerous cracks, some repaired, but all the wood is there … and it is lovely wood, as per the back.  Next step is for me to open up the instrument to have a look inside! Last edited by Matthew Tucker; 05-06-2010 at 01:41 AM.
|
|
#3
05-06-2010, 10:46 AM
|
||||
|
||||
|
hi matthew,
great looking bass. please keep us informed.
|
|
#4
05-06-2010, 02:05 PM
|
|||
|
|||
|
Matthew,
Nice find. The shape, wood and workmanship make me think Paul Claudot or a contemporary of his. Would you post the stop length? You are going to need to remove both the top and back to fix everything. Please take this bit of advice learned the hard way; fix the top first, and just before you re-install it, loosen up the back seams at the blocks. Then remove the back only after the top has been re-glued. I see you are in for a neck graft, button graft, neck block replacement, major crack repairs, varnish and more. It helps me, when faced with an overwhelming restoration like yours, to map out the process and break it down into logical steps. Keeps me from scratching my head too much and damaging the few remaining productive follicles. Good luck.
|
|
#5
05-06-2010, 06:39 PM
|
||||
|
||||
|
thanks Arnold. I have been as systematic as I can, and throughly breaking down the task into every small step and sequence is the only real way I know of estimating and explaining the cost of such a job for the client.
Yes my plan is to fix the front first. Then the ribs and block, then glue top back to ribs and attack the back. I'm not sure how best to remove the centre brace yet, it looks quite solidly glued in there, but it is split in several places. On thing I have noticed is is is very neatly made inside; the blocks are the smoothest i have ever seen, it's almost as if the maker glued a veneer across the face of the entire block - but it doesn't seem to be the case. The linings in the C bout back edge are very hefty, too, about 12mm! and very neatly done. The break appears to start at the upper corners or just after the centre brace ends. String length as far as I can make out is 104.5cm. LOB 1160 UB 525 LB 675 ribs LB 197 ribs CB 200 ribs at neck 153
|
|
#6
05-06-2010, 08:09 PM
|
|||
|
|||
|
Matthew, what is the length from the neck joint to the f-hole nicks? As far as removing the cross brace, the only safe way is to carve it out, bit by bit.

|
|
#7
05-06-2010, 11:23 PM
|
||||
|
||||
|
Quote:
I have heard of smaller ones and seen only one in person but not this type model. Most were what we call 7/8ths models but yours seems to be a 3/4 from your measurements. Not so common in these parts. From the Scroll and linings it looks a Mirecourt type bass. J.T. Lamy made many of these in all shapes and sizes, 3 and 4 string. If all 4 gears match then it was born as such. In the old 1891 Lamy catalog the 4 string was 6.50 more than a 3-string. Wholesale they started at $43.20. With fine wood and flatback it was $67.20. Claudot was probably more expensive. The good ole days.. Not that I remember them that far back..  The linings on these are about 4x the mass needed. Might be easier to just replace the linings rather then chisel them down in thickness and then half the height. Take your time with this like you already mentioned and as Arnold replied. This is an expensive repair in these parts. Probably upwards of $20k from what I see. Oh, and wavy type Top grain like that I have often seen on Jacquet basses. Keep us informed and post as many pics as you like along the way. My Mougenot is on the bench right now with Jeff Bollbach. Some top reshaping in a mold, bass bar, the back re-done including the center joint, some rib work, neck graft, .. the works and I just played it in concert last season!! Still, a Bass needs what a Bass needs..
__________________
Ken Smith ~ http://www.kensmithbasses.com http://www.kensmithbasses.com/doublebasses/ http://www.facebook.com/KenSmithBasses https://www.instagram.com/kensmithbasses/ https://www.facebook.com/ken.smith.904750 
|
|
#8
05-07-2010, 01:51 AM
|
||||
|
||||
|
Removing the top went OK until I hit these nails in the lower and upper bouts.
  The bolt holding the neck together came out with a little persuasion.  As I thought, the bolt had several companions! 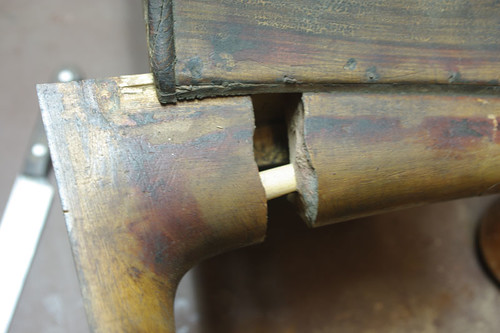 Top off, time to take a closer look: 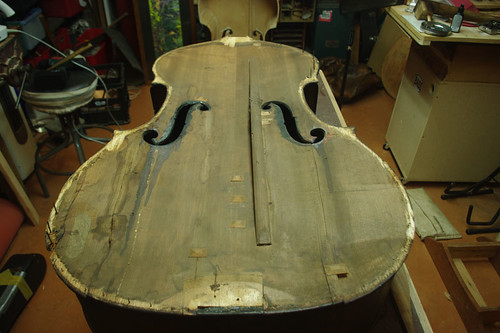 Ugly piece of work. 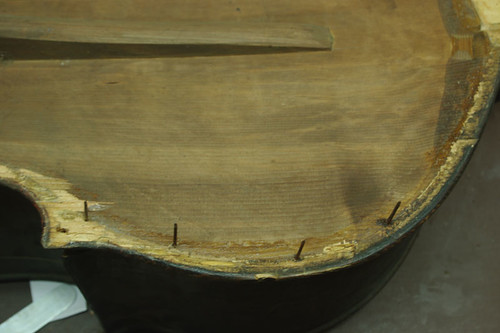 Bottom block area shows previous repairs as you’d expect from a bass of this age. 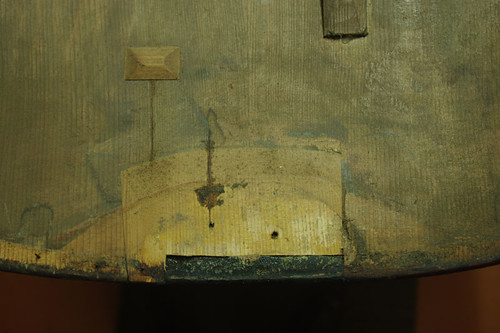 Top block similar 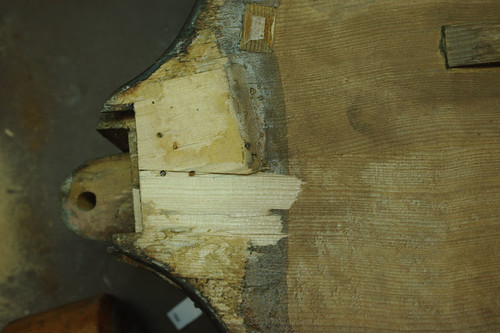 here’s one of the nastier cracks and edge damage caused by nails and putty! I was interested by what looked like a signature across the linen strip, but once cleaned it appears just a zigzag mark with a pencil. So we know for sure the bass was repaired by Zorro. 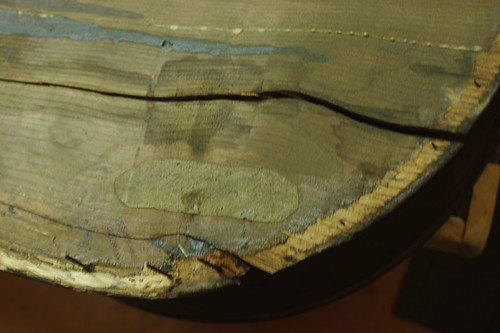 Common cracks here. You can see the glue beads of an old white-glue repair on the RHS 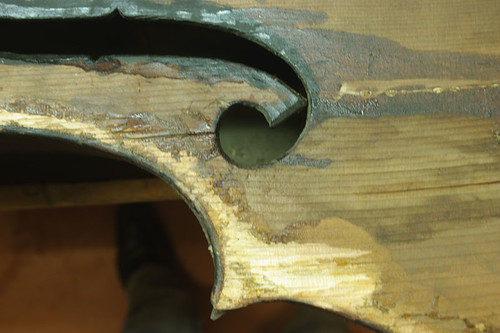 Last edited by Matthew Tucker; 05-07-2010 at 02:48 AM.
|
|
#9
05-07-2010, 01:51 AM
|
||||
|
||||
|
Here’s the first look inside. Filthy dirty so I vacuumed out the crud and had a close look all over, but I can’t find any makers marks, or stamps. Perhaps when I do a proper cleanup something may appear, but I doubt it.
 Inside the top block – can see splits, and yes, a failed dowel repair PLUS a coach-bolt PLUS a whole load of black resinous stuff, probably resorcinol or something like that. 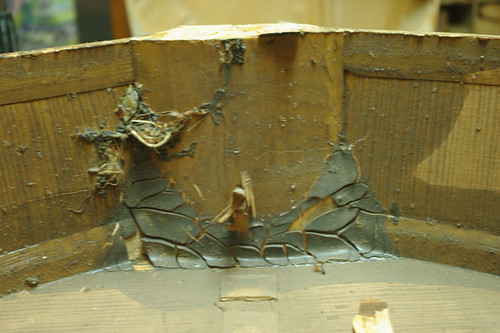 Some successful repairs. Look at how thick the C bout linings are on the right hand side! They are really well made, and the centre brace sits very snugly up against them. 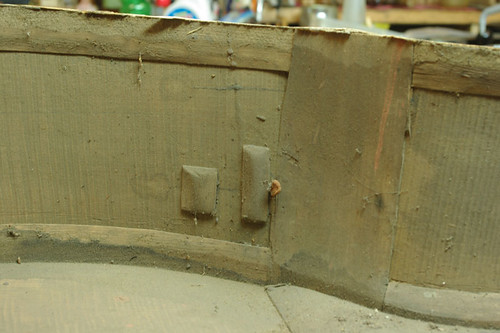 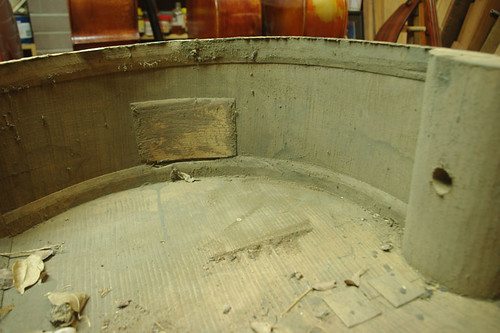 And some failed ones that I’ll have to redo. But look at how smooth and well-made the blocks are! 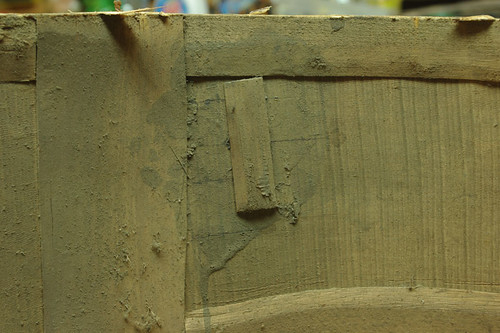 These were put in from through the FF holes I think. 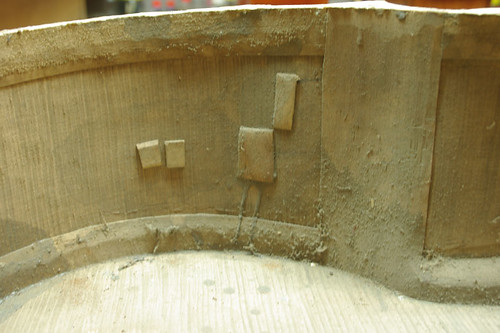 The mortise still has the back of the heel firmly attached. I’m not going to worry too much about this as I have to replace the whole block anyway. 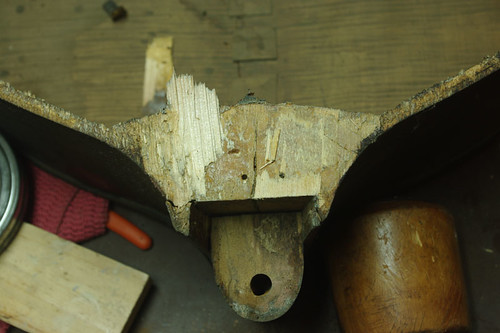 Altogether, this heel had one wooden dowel from back of heel diagonally down into the block, which obviously failed, and which was followed by a coachbolt through the same hole and down into the block at another angle. I reckon THIS is what split the block. Then another dowel through from front to back, (probably through the button) which obviously failed, so this was followed by a threaded rod right through from button through to the rustic fingerboard! Last edited by Matthew Tucker; 05-07-2010 at 03:41 AM.
|
|
#10
05-07-2010, 02:59 AM
|
||||
|
||||
|
Amazing looking wood on that bass. The Flame is outstanding.
__________________
Ken Smith ~ http://www.kensmithbasses.com http://www.kensmithbasses.com/doublebasses/ http://www.facebook.com/KenSmithBasses https://www.instagram.com/kensmithbasses/ https://www.facebook.com/ken.smith.904750
|
|
#11
05-07-2010, 09:48 AM
|
|||
|
|||
|
On most of those, the C-bout back linings are bandsawn poplar or beech. They are extremely wide, the theory being that this would help prevent seam openings. It does work, but we all know that's a bad idea for a couple reasons. You will want to replace those with normal linings. And you might consider a different back bracing scheme. The old "stair step" is reviled for making these basses sound thin and respond slowly. No sleep for you in the year ahead!
|
|
#12
05-07-2010, 10:11 AM
|
||||
|
||||
|
Yes well my instinct was to change that single brace to a more "italian" style of cross bracing. I was also wondering whether by doing so the "integrity" of the "french" bass would be compromised. But this is not a museum piece, has no makers label, and is being restored to play.
That's interesting what you say about the bandsawn linings - I was wondering how on earth you could BEND a 12mm strip around that sort of radius! I'm inclined to leave the other linings as they are, though ... I can't see much to be gained by lightening them. Arnold the stop length is 570mm. What does that tell you? Last edited by Matthew Tucker; 05-07-2010 at 10:27 AM.
|
|
#13
05-07-2010, 12:08 PM
|
||||
|
||||
|
Quote:
The Linings should all be replaced. The larger linings inside stiffen the ribs and hinder vibration. Label or no Label put a normal center Brace and a lower and upper brace as well. I think 3 braces are fine regardless of pedigree. My Mougenot has the same single brace and it's coming out and most likely just what I told you for braces. If you like, my bass will be done before this one and I can tell you what was done, if you like. Ok? ok..
__________________
Ken Smith ~ http://www.kensmithbasses.com http://www.kensmithbasses.com/doublebasses/ http://www.facebook.com/KenSmithBasses https://www.instagram.com/kensmithbasses/ https://www.facebook.com/ken.smith.904750
|
|
#14
05-07-2010, 04:56 PM
|
|||
|
|||
|
Matthew, since you are on the other side of the planet you should have taken the back off first, oh well too late now.
 Fine looking bass there! Good luck with her. To carve the back brace out it shouldn't be to difficult. You might be able to get some controlled splitting and remove the big chunks first, then once down to a bit thinner, you can plane it or keep using a sharp thin headed gouge, finger planes and then wet the last slivers with a damp cloth to remove the splinters and clean the glue off.
|
|
#15
05-08-2010, 10:12 AM
|
|||
|
|||
|
Looks like a nice project Matthew. Give it your best!
|
|
#16
05-09-2010, 11:38 AM
|
||||
|
||||
|
Looks like fun! Love the photo essay! Keep it coming- if you have the time, please!
BG
|
|
#17
05-09-2010, 07:53 PM
|
|||
|
|||
|
Thank you for sharing, Matthew, nice instrument and a lot of work to face!
Did you measured the stop length from the end of the heel or from the upper edge of the front?
|
|
#18
05-09-2010, 08:18 PM
|
||||
|
||||
|
Edge of the heel
|
|
#19
05-09-2010, 09:33 PM
|
||||
|
||||
|
Here’s a summary of the ironwork I’ve removed from this patient to date:
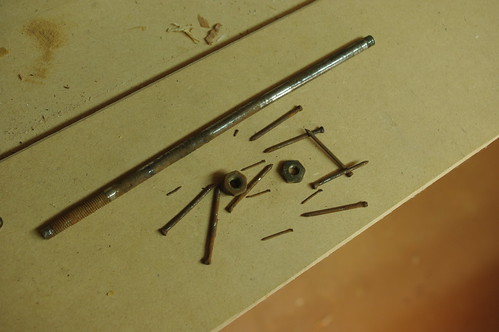 I had a look to see if the tuners had any identifying marks, but nothing exciting to report. Some of the brass plates are worn at the bearings, but the brass cogs, spindles and the worm gears are perfectly fine. We’ll have to decide whether its worth getting the bearings rebuilt, rebushed or just get new tuners. I’m not a metalworker. 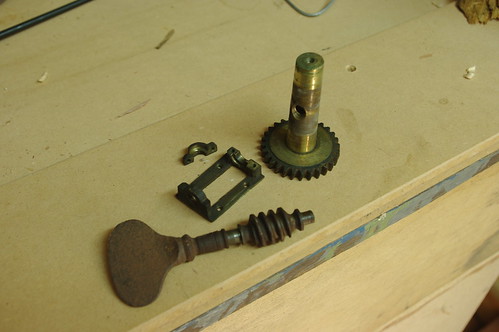 Here’s another bit of fun for later :-( 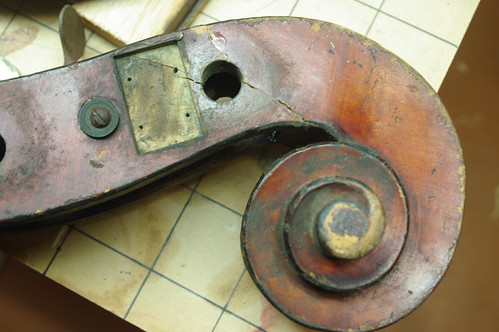 I started gluing some of the newer and cleaner cracks first, and cleaning up glueing edges. 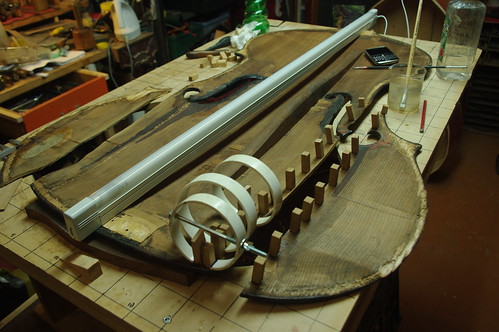 My “in situ” lamp is very useful. 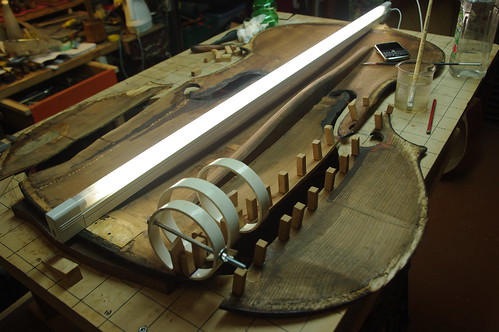 Here’s a horrible mess to clear up. Nails didn’t help at all. 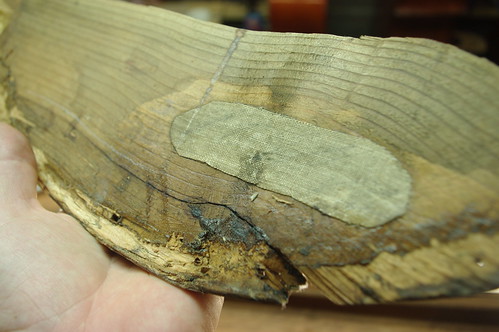 Here’s a closeup of one of the crack edges. The wider part is where the crack sits just below the FFs and the thinner part - about 6-7mm - is the lower bout. I have had to break the longer cracks right open in order to properly clean the gluing surfaces, which are contaminated with varnish and dust and goo. And what looks like read lead paint in places! 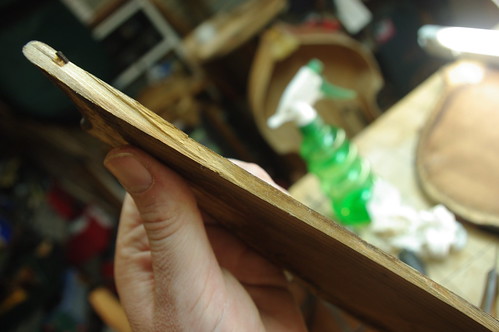 This is a dry run of the first big crack clamping setup. It gets tricky near the FFs where the wood has twisted under bridge pressure. It’s going to be interesting getting this to clamp up tightly. 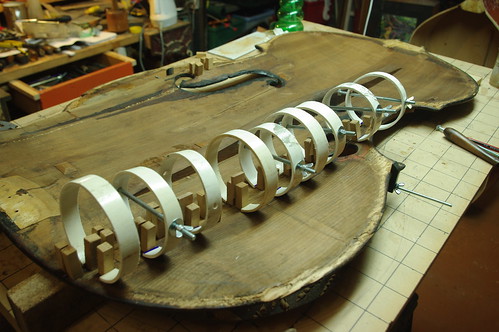
|
|
#20
05-16-2010, 09:53 AM
|
||||
|
||||
|
The top is glueing together quite well. This is the first long crack after the turrets are removed and before cleanup and cleating. Looks a mess, but actually the repair is good.
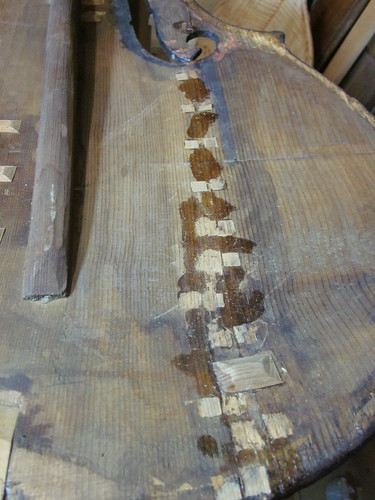 This is the view from the other side, there were two parallel cracks but they've come together quite neatly! The wood is beginning to show through too, after some cleaning with warm water. 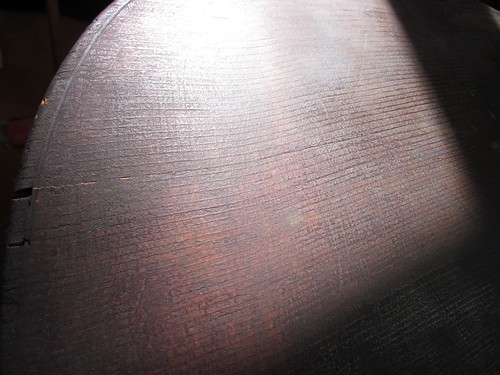 Here's the second long crack gluing. You can see the soundpost crack too; I mark the path of each crack with a chinagraph marker so I know exactly where I have to cleat later. Sometimes the glue line is virtually invisible. 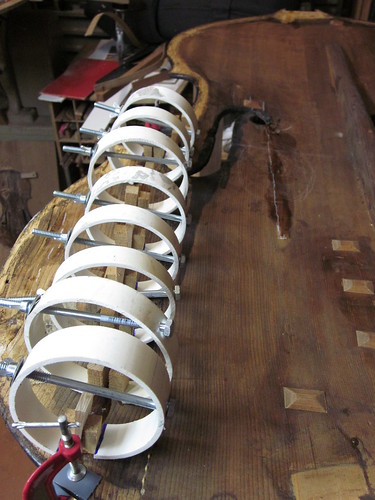 This is one of the previous repairs, done quite well, but I don't like square cleats so I'll probably remove them and replace with diamond ones. The bass-bar on this bass is exactly parallel with the centre seam.  This is a view of the soundpost crack before glueing. nasty.  There seems to be some kind of orange primer used at some point; perhaps its a ground? 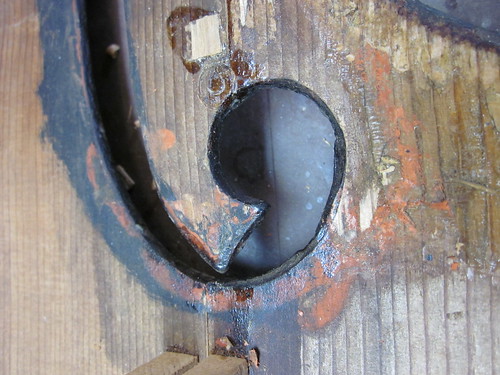
|
 |
| Currently Active Users Viewing This Thread: 5 (0 members and 5 guests) | |
|
|


 Linear Mode

