|
#21
 05-16-2010, 10:23 AM
|
|||
|
|||
|
Very nice repair work, Matthew! Gluing up cracks on bass tops can be really frustrating, but it looks like you have it under control. Beautiful color on the top too!
Are you going to send a sample of the orange ground to the lab for ****ysis?  
|
|
#22
08-09-2010, 06:00 PM
|
||||
|
||||
|
Anything new with this?
|
|
#23
08-09-2010, 08:50 PM
|
||||
|
||||
|
I have progressed somewhat with the top restoration, but have been overseas for six weeks and so everything ground to a halt. Will resume work on the bass soon and post more pics.
|
|
#24
08-28-2010, 08:26 PM
|
||||
|
||||
|
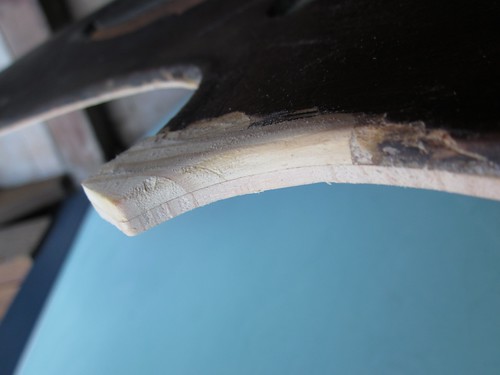
You can see how worn the corners were here:
   After gluing most of the belly cracks (I found a few more) I had a go at repairing the corners with my usual repair wood but i wasn't happy with the result, as the grain really didn't match. The grain on this bass top is wide at the flanks, and wavy. So I tried using the reed-by-reed technique i posted a link to a week ago. I cut away a part of the damaged wood along the grain line, then glued in a single piece of wide grain spruce. Then trimmed it back, and then added another. 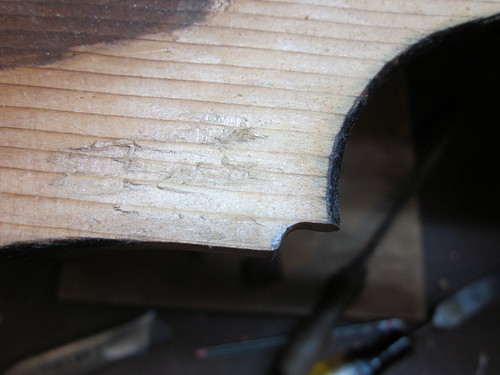 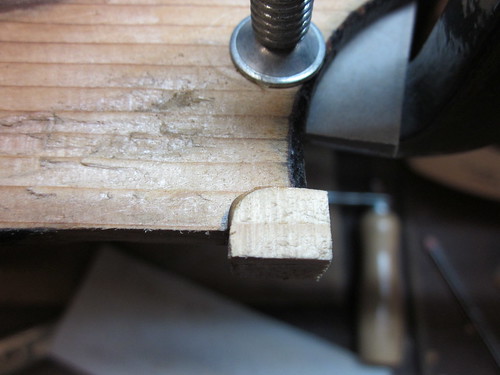 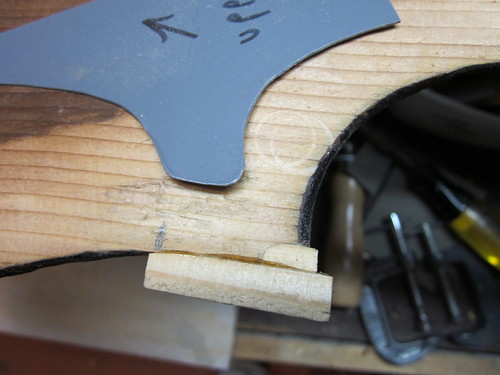 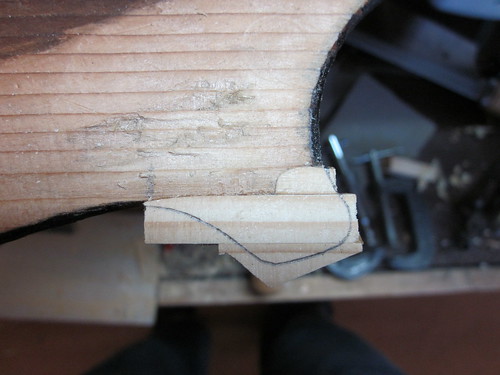 I'm working from the back here but i check the front to make sure the grain lines are reasonably straight. They will be covered in a dark varnish, but with purfling repaired they will look much better. I addition, these corners - and a lot of the edges - will get a half-edging repair. so what you see above will be covered with perhaps 2-3mm of tighter grained spruce, which will be better for gluing to the blocks! Last edited by Matthew Tucker; 09-03-2010 at 07:39 PM.
|
|
#25
09-03-2010, 11:10 AM
|
||||
|
||||
|
As it happens ... in case anyone likes to watch.
This is a previous repair to the block area of the lower bout 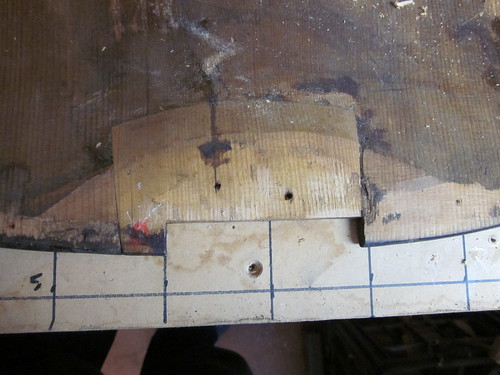 However, cracks have developed along one side and i don't like the previous repair or the nail holes so I'm removing the old repair and replacing with new wood.  I've removed all but the last 2mm of the top wood and tapered the edges inwards so that the patch fits tightly and the repair edge doesn't align with any grain. I've lost a bit of the very brittle purfling near the saddle but this was falling away anyway. 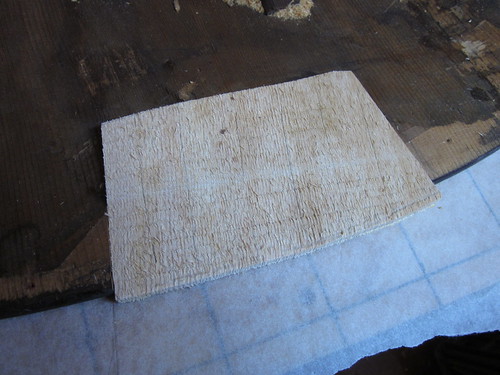 That's the patch glued in. Still has to be planed flat. There was a similar problem up the top end. 2" nails through the top had made a nasty mess and a fair bit of wood had come away when removing the top from the block. And a previous repair. You can see my first exploratory gouge to see whether I could do an inlay patch, but nup. Had to go further to make sure the repair was sound. 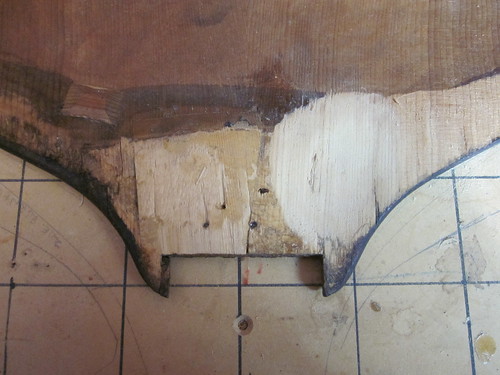 I had to remove only enough spruce till I got to reasonably sound wood. I filled the nail holes with sawdust and hide glue from the back; i'll do a better repair from the front, later. 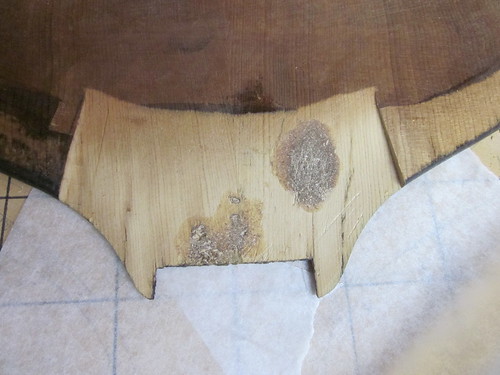 here's the patch glued in, waiting to be trimmed back. 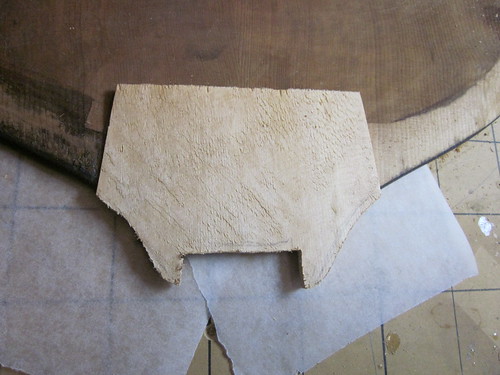
|
|
#26
09-03-2010, 11:19 AM
|
||||
|
||||
|
This is what nails do to the edge! I've planed back the crumbly chipped edge back to clean wood.
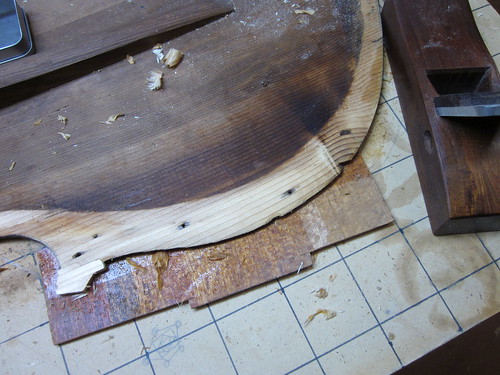 closer, you can see what this spruce is like. Wavy, wide-grained, with a few brittle knotty bits at the flanks like this  or this bit of repeated trauma which has pulverised the spruce under the varnish. I have to plane back as far as i dare then do the rest with glue and new spruce edging. 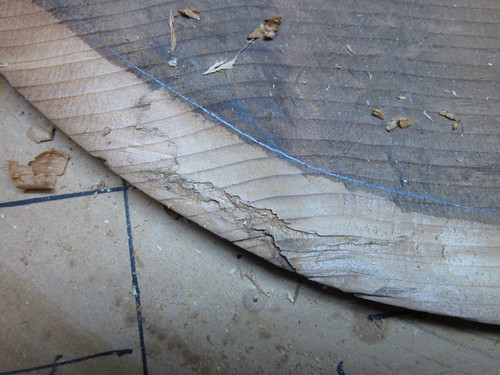 This new spruce is much nicer to deal with and will properly strengthen the original edges. It will glue better, too. 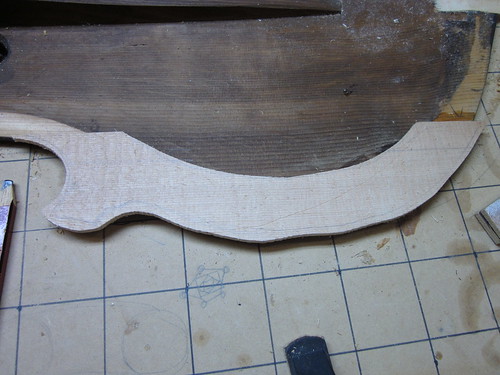
|
|
#27
09-03-2010, 11:34 AM
|
||||
|
||||
|
Looking good Matt. On those Block area inlays, did you considered a feathered-in patch like a breast patch type (and inner half edging) so as not to create another fault line in the process? There is considerable pressure on the Top at the block areas. Anything that can be done to avoid future trouble would be good. Just like saddle cracks. A tight patch in there like you've shown might act differently than a feathered-in type repair.
__________________
Ken Smith ~ http://www.kensmithbasses.com http://www.kensmithbasses.com/doublebasses/ http://www.facebook.com/KenSmithBasses https://www.instagram.com/kensmithbasses/ https://www.facebook.com/ken.smith.904750 
|
|
#28
09-03-2010, 11:41 AM
|
||||
|
||||
|
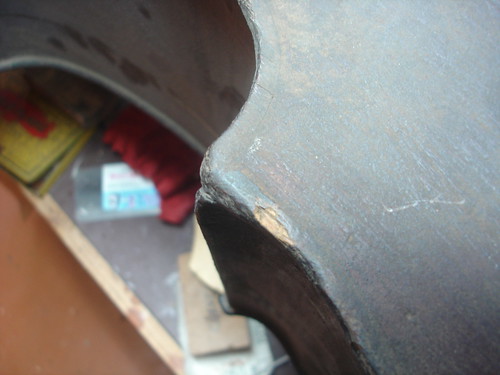
You're right, and I did consider it, but in the end I decided that angling the ends inwards as i have done will also spread the stress across a number of grains, much less likely to cause a fault crack as on the Right Hand Side of the picture below. Also the grain of the patch is very slightly offset so it doesn't run parallel with the top grain. Feathering the edges is quite a bit more work.
in fact you can see in the original repair, the left hand edge is still quite sound; it is angled. The right-hand edge however is parallel to the grain of the top and right alongside the saddle cutout - recipe for a weak point and a classic saddle crack, which is in fact what happened. Last edited by Matthew Tucker; 09-03-2010 at 07:32 PM.
|
|
#29
09-05-2010, 09:52 AM
|
||||
|
||||
|
Father's Day here. Bacon and eggs for breakfast ... and a day in the workshop!
--- Here's another reason I feel the half edging is necessary on this plate:  The wood is brittle and knotty in spots all around the edges; this is a weak point, has cracked before, and even to plane it down I need to wet it down and use a very sharp blade. Here it is after thinning the edge carefully, and a piece of repair spruce that looks like a bear wiped its backside on it. Other than the staining, it's fine repair wood! 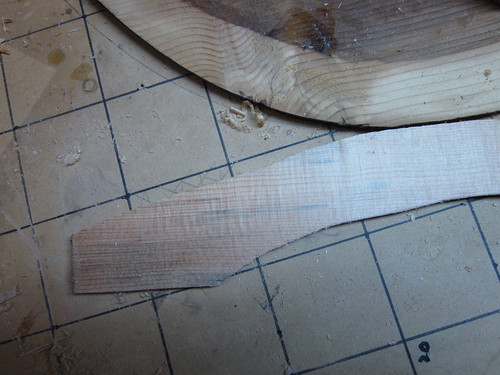 You never have too many clamps. 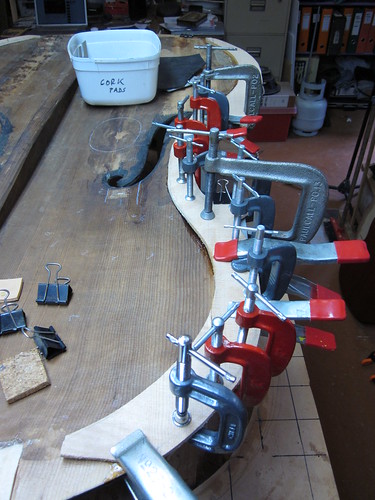 After the glue has dried the edges are carefully trimmed and blended into the original top shape, and then thinned to the original 8mm. Sounds easy, eh! 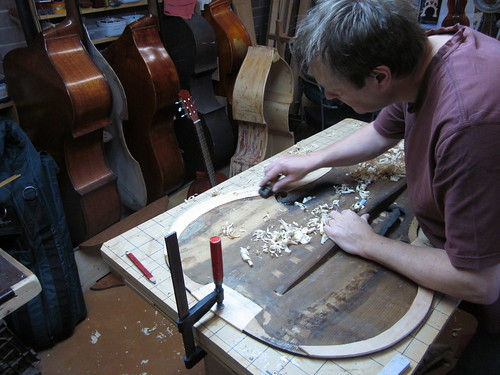 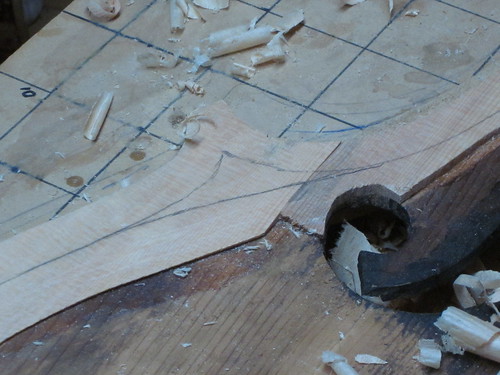  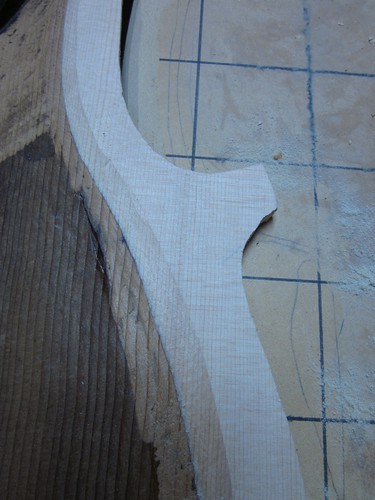  Next job is the soundpost patch.
|
|
#30
09-05-2010, 11:45 AM
|
|||
|
|||
|
Question, Matthew. On the 2nd to last pic above, is your new half edging going over a previous half edging job (it looks like the grain doesn't line up under yours)?
|
|
#31
09-05-2010, 06:17 PM
|
||||
|
||||
|
No there's no previous half-edging. In blending the new wood with the old, I have planed a thin layer of crud off the old wood so that the inside arch is a smooth transition to the new edge. In fact this bass had a very thick ledge around the edges and in places I have removed the surplus, because it's really not necessary. What you can see from left to right is ... dark old spruce, clean old spruce, shiny new white spruce.
The top has been repaired before, but most of the cleats have just popped off - I suspect because they were glued over the "patina" which isn't as good a glueing surface as a clean wood surface. I was going to leave the very dark old surface wherever I could, and just clean under the cleats, but now that I can see the lovely old spruce underneath I'm considering scraping the whole top back to clean; this would reveal all previous cracks and be much easier to repair now and in the future. But it would involve removing a very thin layer, say 0.3mm, all over. I'm not intending to regraduate the top; there's nothing wrong with the thicknesses, and its sufficiently thick that removal of a very thin layer won't structurally weaken the top. The amount of wood I would remove would be much less than the additional wood I'll be adding in cleats. What do you think? Last edited by Matthew Tucker; 09-06-2010 at 07:59 AM.
|
|
#32
09-06-2010, 07:57 AM
|
||||
|
||||
|
Now where was I?
Oh yes ... remember this great big soundpost crack?  I glued it up well, but if this isn't reinforced properly the glued-up crack will just bust again when the pressure's on. So, working from the back, I make an oval patch from spruce and trace around it, then start hogging out a bit of a hole. 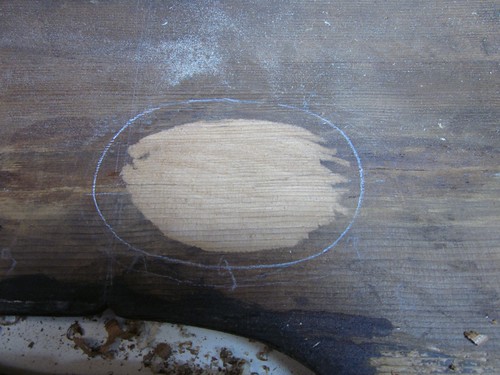 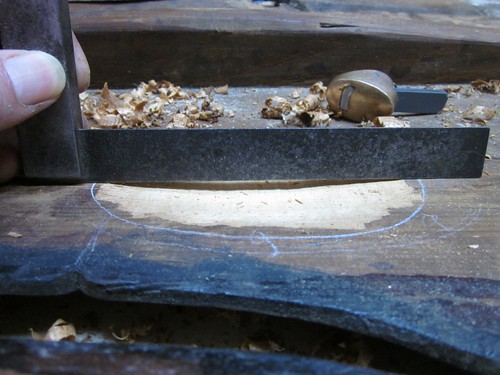 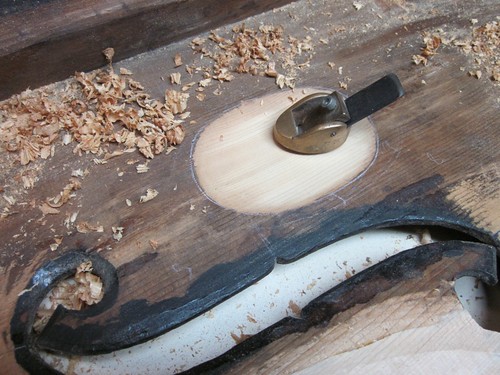 Mustn't get carried away ... 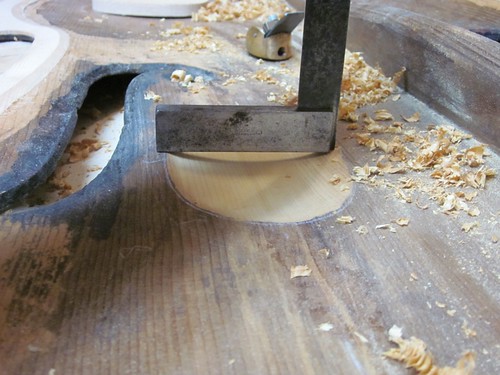 I like this next pic, because it shows up the depth of the lovely darkening of the wood due to age! The nice brown coloration is full 2-3mm into the wood. Someone who has done this on many more basses that I have (like Arnold, or Ken) could probably date the thing looking at the colour alone. You can see the original crack entering at the left and a slightly darker area where it is glued. I'm careful about the final shape of the curved bed. 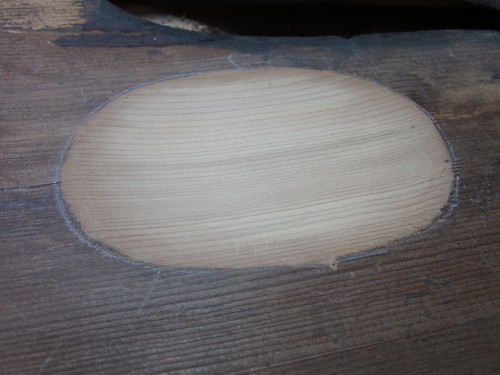 Next step is to spot glue some guides for the patch to make sure it always goes back exactly in the same spot. There a many ways to do this, and this is the way i'm doing it, this time! The grain of the patch is slightly offset from the grain in the top. 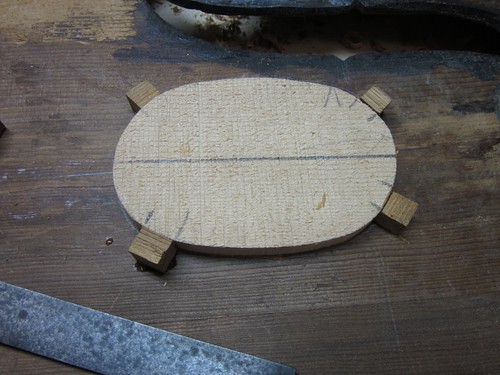 Now that the glue is drying, I have to do some work work.
|
|
#33
09-06-2010, 11:55 AM
|
|||
|
|||
|
Question Matthew, Is it possible to see a picture of the edge repair from the front, or edge of the plate? Thanks, Craig
|
|
#34
09-07-2010, 08:32 PM
|
||||
|
||||
|
I think this is what you want to see Craig.
 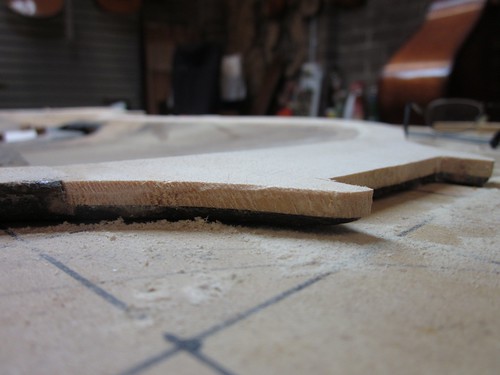 I have not worked on shaping the edges yet. And i'm going to have to sweat over the purfling in the corners :-/
|
|
#35
09-07-2010, 08:37 PM
|
||||
|
||||
|
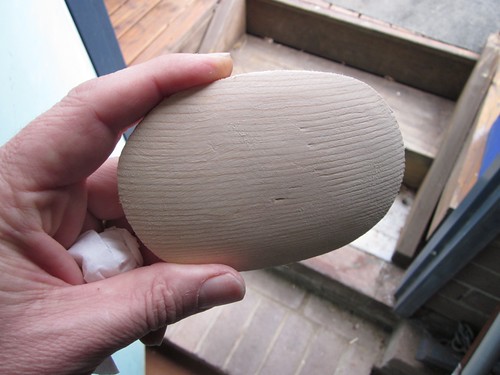
The soundpost inlay patch is shaping up well. I'll finish it off and glue it in tonight after the gig.

|
|
#36
09-07-2010, 10:37 PM
|
||||
|
||||
|
This is a great thread; I'm following along like a soap opera. Sorry, daytime drama.
 Thanks for posting; the photos are great - I wish I had the patience to stop in the middle of doing anything and taking so many photos!
|
|
#37
09-08-2010, 02:17 AM
|
||||
|
||||
|
Thanks for all the bass love guys. Unfortunately for me I'll have to give the bass back to the client when it's complete! But fortunately for me, I have a french lodger for the next year or so.
|
|
#38
09-09-2010, 09:26 PM
|
||||
|
||||
|
Here's the patch just before gluing in:
 And here's the patch glued in and trimmed: 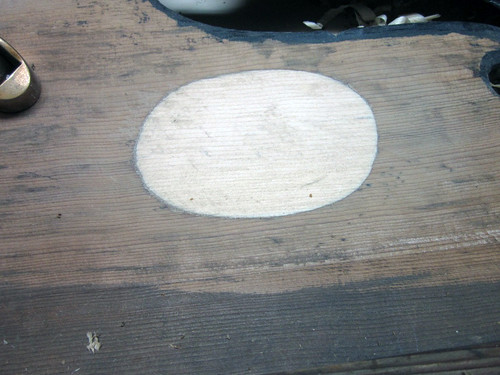 You can see how nicely it fits at the edges. I'm pretty happy how it turned out :-) 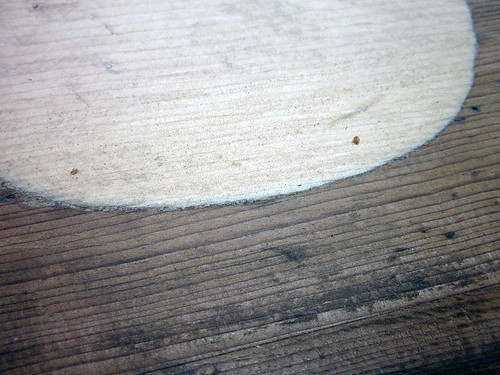 I decided that I *would* shave the thin dark layer off the surface of the wood, at least as far as the bass bar, and I'm glad that i did. These patches look as if they are reinforcing the main centre glue line. 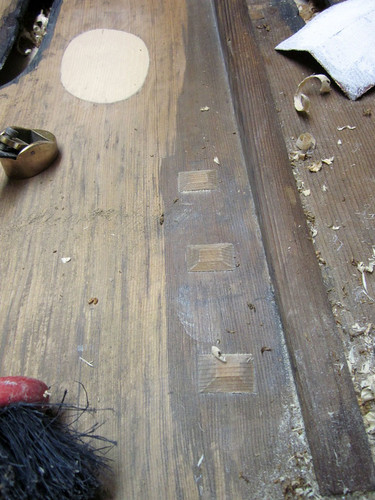 But when the dark layer is removed, it's very clear that there's another previous crack there that I couldn't see before (see next pic). It's a bit of a pity to remove the dirt/patina, but going back to clean wood is going to allow me to make better repairs, and as the purpose is to result in a functional bass, I think the decision is sensible. 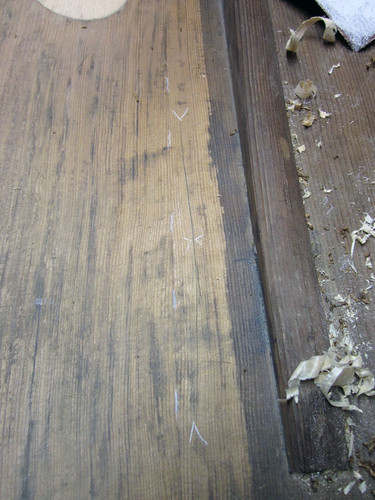 This is a nice view of repaired top to date. 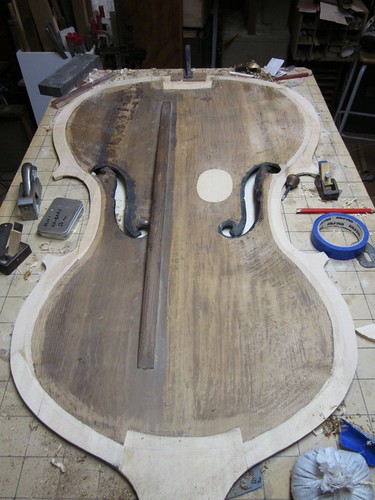 We've made it from here: 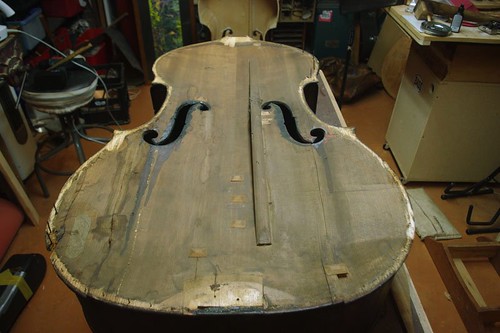 to here: 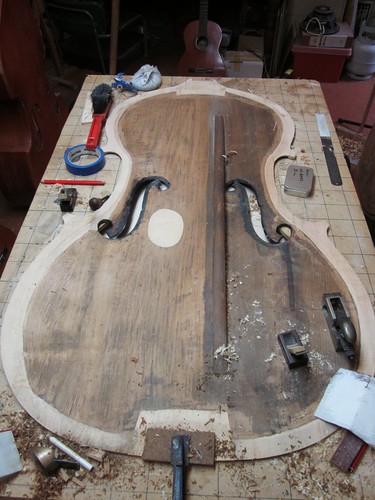 And I really MUST do something about getting a consistent colour-balance in my photos! Last edited by Matthew Tucker; 09-10-2010 at 12:59 AM.
|
|
#39
09-09-2010, 11:04 PM
|
||||
|
||||
|
No-one ventured an opinion on my question on scraping the dark crud back to clean wood in post #32, so I made a judgement that it would be better to shave a very thin layer off and make sure I make good glue repairs, than leaving it there for the looks only. The wood is still darkened with oxidation, and there is no doubt about the age of the instrument.
|
|
#40
09-10-2010, 12:03 AM
|
||||
|
||||
|
Quote:
On the aging, you can see how deep the oxidation goes when working on it. Some basses are so old that the wood is dark all the way through. I don't know how to date a bass by its wood color. I guess the oxidation depends on where and how the bass was kept or used. Keep up the good work.
__________________
Ken Smith ~ http://www.kensmithbasses.com http://www.kensmithbasses.com/doublebasses/ http://www.facebook.com/KenSmithBasses https://www.instagram.com/kensmithbasses/ https://www.facebook.com/ken.smith.904750
|
 |
| Currently Active Users Viewing This Thread: 20 (0 members and 20 guests) | |
|
|


 Linear Mode

