|
#1
 12-13-2010, 07:31 AM
|
|||
|
|||
|
I have decided to take on my 'bass in a bag project' and repair this old instrument that I found in severely bad shape.
Its taken me a while to take the back off . It was epoxied to ribs with a thick barrier of the stuff all round.At times I had doubts that I would manage without causing damage but finally its off and almost cleaned of Gorilla glue and epoxy. The bass has a typical old French brace made of a piece good looking spruce. The upper brace I got off and can use again with a little shaping and the lower bout brace will be replaced. My question is should I replace the large brace or not ? This would be a consideration for tonal purposes if it applies. The brace is glued on with hide glue and has stayed original by the looks of it. It would make great wood for the repairs that the top will be needing. Any advice / insight would be great .... 
|
|
#2
12-13-2010, 05:03 PM
|
|||
|
|||
|
In the interim I have decided that it would be the correct thing to just keep the brace as the maker had envisioned . Its French after all .
|
|
#3
12-13-2010, 05:39 PM
|
||||
|
||||
|
Quote:
Maybe better and full shot pics might help. You can see all of the bass but we can only see the parts that you show us.
__________________
Ken Smith ~ http://www.kensmithbasses.com http://www.kensmithbasses.com/doublebasses/ http://www.facebook.com/KenSmithBasses https://www.instagram.com/kensmithbasses/ https://www.facebook.com/ken.smith.904750 
|
|
#4
12-13-2010, 11:02 PM
|
||||
|
||||
|
Quote:
|
|
#5
12-14-2010, 08:43 AM
|
|||
|
|||
|
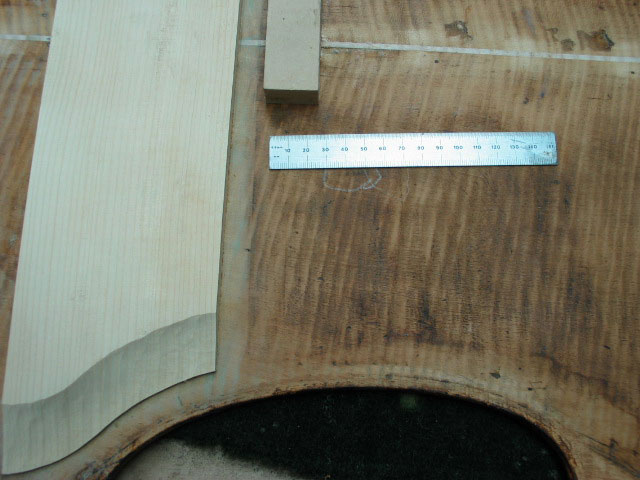
Here are a couple of pics. The centre join had a piece of epoxied wood in it up to the big brace as can be seen in the pics. The back sits perfectly on the ribs now after I took it off (before it was being pulled in all directions from the epoxy).
Now what route to take.... full center seam inlay ??? Due to massive peer pressure I will replace the back brace . Any advice on how many braces the bass will need , Im guessing 3 or will sturdy patches along the centre seam be an option ...?
|
|
#6
12-14-2010, 10:38 AM
|
||||
|
||||
|
Quote:
The Center joint may need to be re-jointed and then, a strip placed in there to fill the gap. Also, how is the overhang of the Top on the bottom bouts over the Ribs? Overlaps or more flush like? If Flush, cut the ribs at the block and tuck them in slightly shorter. The lower corner blocks may need trimming under the Ribs as over time, the string pressure pulls the lower block forward bending the back at the bottom under that wide stair-step brace as well as twisting the corner blocks inwards. This is a common fault with old French basses and correction is not easy. The bass needs to be modified. Just like with blockless basses, if made with corner-cutting, money-saving techniques, it needs expensive corrections in restoration. Just guessing here what you may need. 
__________________
Ken Smith ~ http://www.kensmithbasses.com http://www.kensmithbasses.com/doublebasses/ http://www.facebook.com/KenSmithBasses https://www.instagram.com/kensmithbasses/ https://www.facebook.com/ken.smith.904750
|
|
#7
12-14-2010, 12:14 PM
|
|||
|
|||
|
Quote:
Now thats interesting info ( the peer pressure is now at boiling point  ) .... ) ....When I sit the ribs on the back , the fit is good with approx 3-5mm overlap all round . Surprisingly with all the non original glues , cleats etc the bass seems to have regained its shape to a large extent . I will remove the middle bar and use it for the top repairs , there is a lot of wood to be had from it. Ken when you talk about cutting the ribs at the 'block' to get a good plate fit are you talking about the end block ?
|
|
#8
12-14-2010, 12:25 PM
|
||||
|
||||
|
Quote:
__________________
Ken Smith ~ http://www.kensmithbasses.com http://www.kensmithbasses.com/doublebasses/ http://www.facebook.com/KenSmithBasses https://www.instagram.com/kensmithbasses/ https://www.facebook.com/ken.smith.904750
|
|
#9
12-14-2010, 04:14 PM
|
|||
|
|||
|
In this case where the back and top are off at the same time , which should go on first , and is it ever ok to have to push the ribs in a bit whilst gluing and clamping if they are a little out of position in a few places?
Ken also if the ribs get cut down at the end block , then surely the top overhang will differ slightly i.e , maybe more overhang in the middle of the lower bout than at the end block due to the top not being exactly shaped to the rib dimensions anymore ...
|
|
#10
12-14-2010, 04:19 PM
|
||||
|
||||
|
Quote:
If the Back is less work, then do that first since you have a mess to deal with either way from taking it all apart at once. Good luck!
__________________
Ken Smith ~ http://www.kensmithbasses.com http://www.kensmithbasses.com/doublebasses/ http://www.facebook.com/KenSmithBasses https://www.instagram.com/kensmithbasses/ https://www.facebook.com/ken.smith.904750
|
|
#11
12-14-2010, 05:07 PM
|
|||
|
|||
|
Quote:
Jeeez , now I feel like a war criminal... Maybe I never had an option but to take the back off !!! Firstly the bass came with the top off and in 3 pieces due to the fact that the back was glued on with a &^%&^ load of epoxy . Whoever epoxied the back made sure that the ribs were forced in by a good few mm all round , making sure that the opposing pressure on the top would pull it apart . So what was I to do , rebuild the top to accommodate a very unique and asymmetrical rib shape and then once that was glued on remove the back and rebuild the back to mirror the top ?? My intentions are simply to learn as much as possible about repairing and maintaining basses.
|
|
#12
12-14-2010, 08:30 PM
|
||||
|
||||
|
Quote:
__________________
Ken Smith ~ http://www.kensmithbasses.com http://www.kensmithbasses.com/doublebasses/ http://www.facebook.com/KenSmithBasses https://www.instagram.com/kensmithbasses/ https://www.facebook.com/ken.smith.904750
|
|
#13
12-15-2010, 12:38 PM
|
|||
|
|||
|
Quote:
|
|
#14
12-15-2010, 12:54 PM
|
||||
|
||||
|
Quote:
   As you can see, the blocks were left in till after the crossbars were glued in and taken out only when.. Arnold? (you tell him..  ) )
__________________
Ken Smith ~ http://www.kensmithbasses.com http://www.kensmithbasses.com/doublebasses/ http://www.facebook.com/KenSmithBasses https://www.instagram.com/kensmithbasses/ https://www.facebook.com/ken.smith.904750
|
|
#15
12-15-2010, 03:46 PM
|
|||
|
|||
|
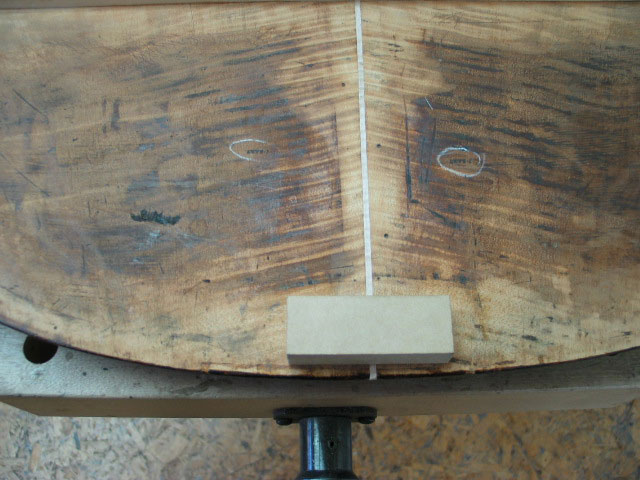
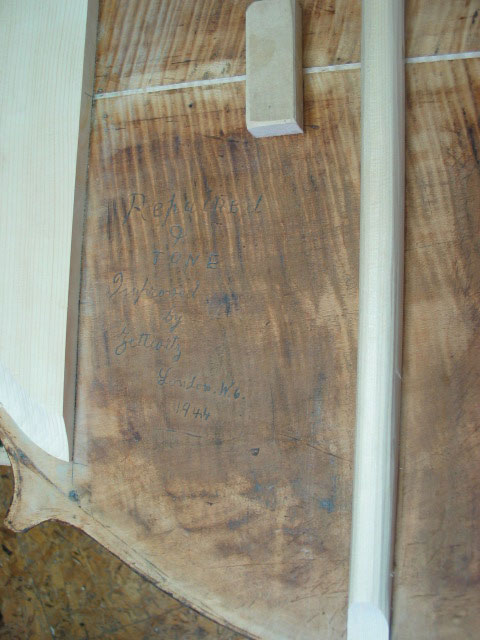
Ok now what to do .... ?
The back fit is textbook ie a healthy amount of overhang all round . If I clamp the neck and end blocks to the back it maintains perfect symmetry so I believe that with an extra pair of helping hands I will get the fit correct without having to apply unnecessary distortion to the ribs. The gap you see at the lower bout join was originally filled with some wood that I removed / the gap must have been man made to try and cover up for some damage or something / i.e it is not caused by shrinkage etc.. My question is do I refill the gap with wood as was or plane the gap to an even width and insert a strip like on the pic Ken posted . Obviously cosmetically the latter is the proper option or ?
|
|
#16
12-15-2010, 04:38 PM
|
||||
|
||||
|
I'd be inclined to re-joint the back and put a tapered strip in. Heck I'd probably use ebony or something!
") If the rest of the joint is already solid though, I guess you could inlay a slice into the gap - but it wouldn't look as nice and probably wouldn't be as solid long-term... Basically I'd un-do everything and make the back perfect, then go from there. Since you have the top and back both off (right?), getting the back to be a nice perfect platform should be a lot more pleasant when you're putting things back together!
|
|
#17
12-15-2010, 09:35 PM
|
|||
|
|||
|
Another way is to restore the top, then to make a template from it, maybe with thick plywood, then to glue the ribs on the template, only at blocks, temporary, then to decide what to do with the back, then to restore the back and glue it on the ribs, then to remove the template and glue the top. this way you can widen (or not) the back to follow the top shape. Also, the top-ribs joint is usually flat, while the back is bent.
My two cents, good luck.
|
|
#18
12-15-2010, 10:12 PM
|
||||
|
||||
|
Usually once I take the top or back off, I keep the corners and blocks into position with a sheet of 4mm plywood. Cheap and simple. A small screw through the ply into the face of each block holds everything in position until i'm ready to replace.
Jointing a back with a bend or curve in it, is tricky. You can't just line them up on a tabletop. I note Arnold's temp block method which I 'll have to try. Last one I did, I built a pair of cradles to which I tack-glued the back pieces. This allowed me to align them on a flat surface, plane the edges and clamp the insert simply and accurately.  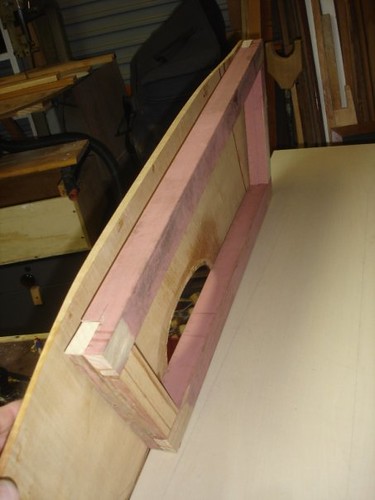 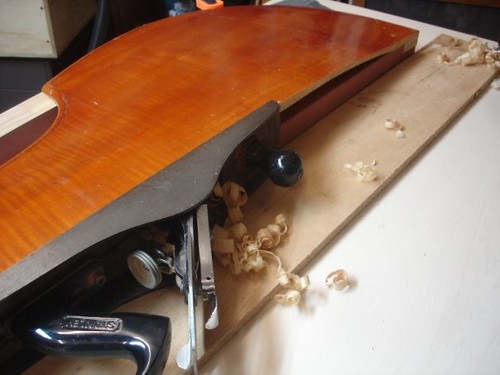 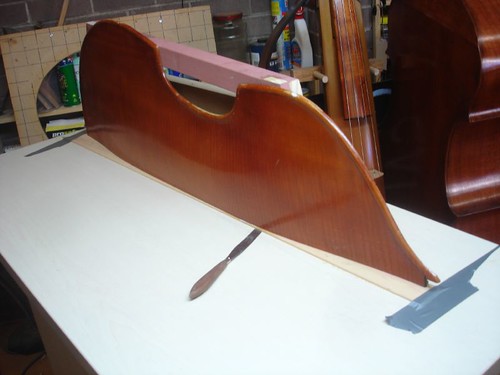 ... and before anyone says anything about the alignment of the upper bout in the next picture, this was just the two sides pushed up against each other before glueing! 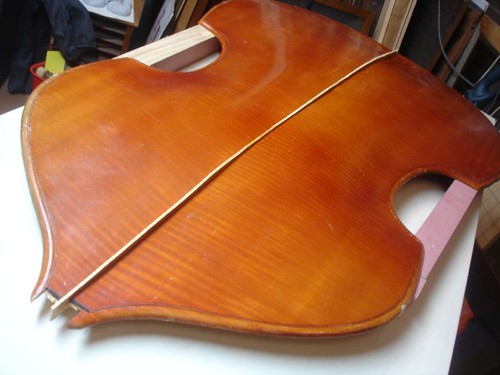 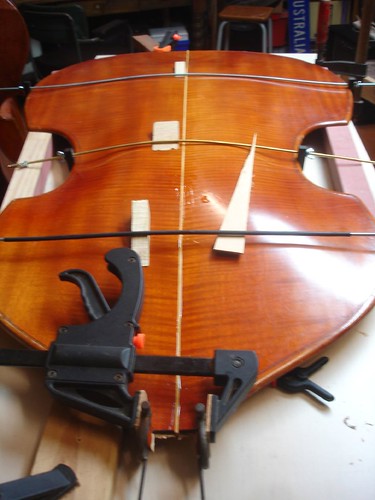
|
|
#19
12-16-2010, 01:02 AM
|
||||
|
||||
|
Matt, the work looks good.
Adrien, being that you can see the bass in person and we can't you have to decide the method of attack. Personally, I think a complete re-joint of the center with an even strip in the middle would look best and be the safest way to go. This way, you can trust the joint you made. If not and it fails again where you didn't touch it, then it's back to square one again. Do it once and do it good.
__________________
Ken Smith ~ http://www.kensmithbasses.com http://www.kensmithbasses.com/doublebasses/ http://www.facebook.com/KenSmithBasses https://www.instagram.com/kensmithbasses/ https://www.facebook.com/ken.smith.904750
|
|
#20
12-16-2010, 02:21 AM
|
|||
|
|||
|
[quote=Matthew Tucker;21282]Usually once I take the top or back off, I keep the corners and blocks into position with a sheet of 4mm plywood. Cheap and simple. A small screw through the ply into the face of each block holds everything in position until i'm ready to replace.
Jointing a back with a bend or curve in it, is tricky. You can't just line them up on a tabletop. I note Arnold's temp block method which I 'll have to try. Last one I did, I built a pair of cradles to which I tack-glued the back pieces. This allowed me to align them on a flat surface, plane the edges and clamp the insert simply and accurately. Nice work !!! Thanks for the pics PS-is Warne really making a comeback ?
|
 |
| Currently Active Users Viewing This Thread: 1 (0 members and 1 guests) | |
|
|


 Linear Mode

