|
#181
 06-27-2012, 08:43 AM
|
|||
|
|||
|
Matthew, how's that neck coming?

|
|
#182
06-27-2012, 10:15 AM
|
||||
|
||||
|
Not much change since you last saw it at Oberlin!
 As you may recall, after gluing the bits together again 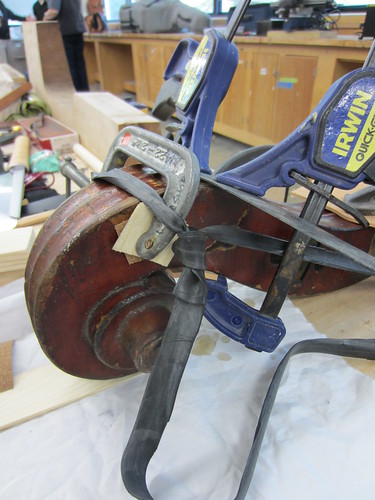 I let Robbie loose with his jig 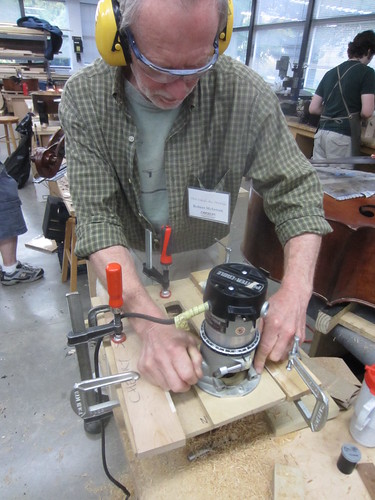 and before too long the mortise was formed.  then we cleaned up the nice grafting block you sold me  made some more fluffy shavings and chalk dust 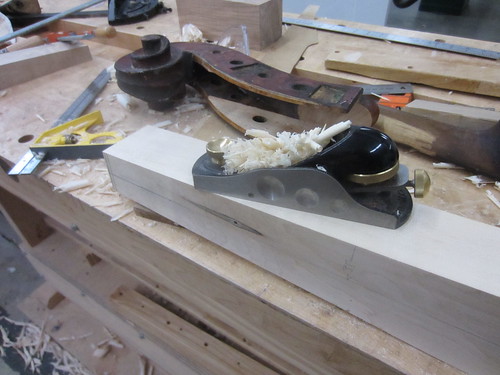 and fit the neck nicely into the mortise   It made it back here with the rest of my tools and tonewood, in one piece and without grief from customs officials  and is now on my second bench waiting for the weekend when i can crank up the bandsaw to cut some new cheeks.
|
|
#183
06-28-2012, 11:43 AM
|
||||
|
||||
|
That's great! I was wondering how you made out with the travel case. It was a pleasure sharing a bench with you. Got to see the process up close and personal.
Can't wait to see it recheeked and all finished! Best, Brian
|
|
#184
07-01-2012, 09:24 AM
|
|||
|
|||
|
Nice pics and work, Matthew. Brian, will you be starting up a thread on your endpin experiments soon? How is the Tarrantino sounding?
|
|
#185
07-01-2012, 01:42 PM
|
||||
|
||||
|
Hey Arnold,
Yes, I am still working on some ideas, but things are going well. Harrison is in town and I had him play it for me with a couple of different pins. I think I may just plug the regular endpin hole with a tailpiece hanger and just use the Laborie. I am starting to get used to it. Been tweaking the set up some, and I about have it dialed in. It sounded really good with John playing this morning. I will be posting some things on it in the next few weeks. I just finished reorganizing my shop and now I can actually walk to my Lathe! Now that I have figured out how to play in that position, I can experiment with the different materials. Best, Brian
|
|
#186
08-28-2012, 12:58 PM
|
|||
|
|||
|
So how's the bass coming along, Matthew?
|
|
#187
08-28-2012, 08:24 PM
|
||||
|
||||
|
OK, OK
 Once the graft was glued, I checked the cheeks and back. 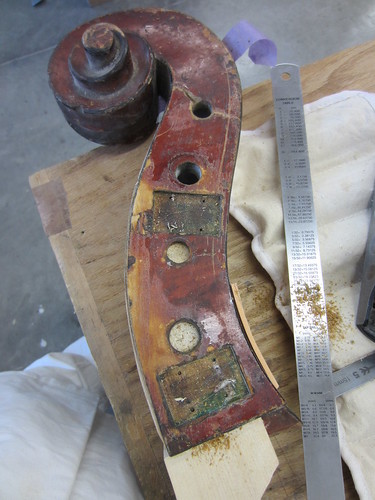 The repair join was good, but it was a toss-up between an inlay repair of the back of the scroll and re-doing the cheeks. Given the state of the scroll, I decided to re-cheek as well. Also, there is the little broken bit of the edge that I put somewhere and now cannot find ... 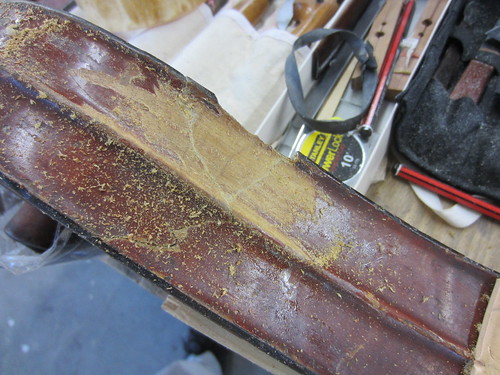 While I was waiting for suitable repair wood to arrive from Europe, I hollowed out the pegbox. That's the Lignum Vitae carver's mallet my Mum gave me a few years back.  The black mark is a woodpecker peck, or a nail hole, or something. It doesn’t worry me as it’s not in a critical position. I may chisel it out altogether eventually.  The sides were planed back as little as possible and holes filled where needed with new maple. These will mostly be covered and the holes drilled out again, but a bit of repair wood in there will minimise splitting. 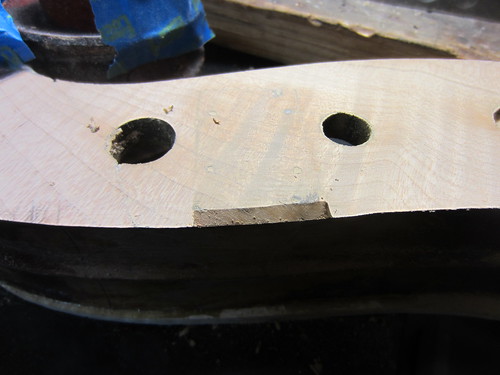 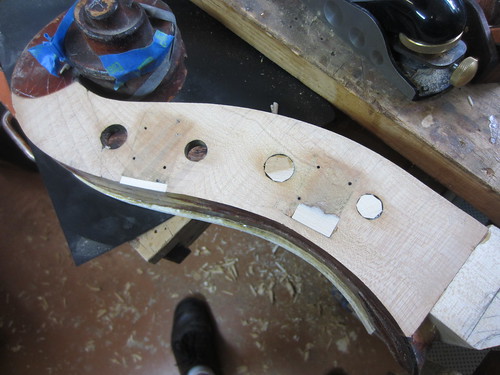 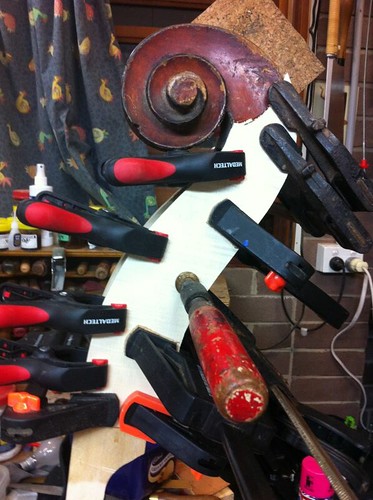 The scroll this morning, new cheeks and in process of shaping. I was careful to document the chamfer before planing off the sides, so I can try to make the new chamfer as close to the original. 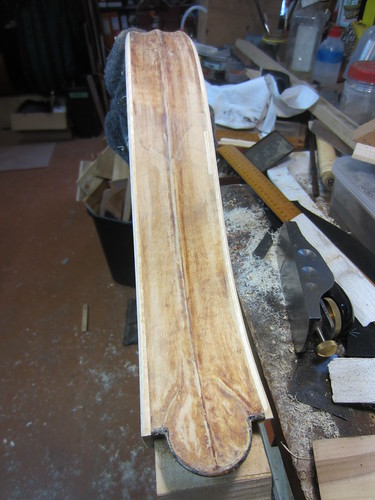 The sides of the scroll will be probably 1.5mm thicker than the original, and I will probably finish the top of the cheeks with a gentle scoop into the existing volute, instead of a smooth transition, as I want to keep a good thickness of wood up near the top of the pegbox where it counts. On the pic below I have redrilled the guideholes for the tuners; I measured these with calipers using triangulation from the lower corners before gluing on the cheeks. You can also see a tiny hole where I used a pin to accurate register the cheeks for gluing.  The new cheeks were cut from a flamed violin back wedge. Even though the grafting neck block itself was rather plain maple, I decided it would be a pity not to try to match the flame on the rest of the instrument, in the scroll. Due to the smallish size of the back wedge, the flame is angled back a few degrees from normal. It's nice flame, pity my lighting is so crap. Last edited by Matthew Tucker; 08-28-2012 at 09:09 PM.
|
|
#188
09-02-2012, 11:16 PM
|
|||
|
|||
|
Looks great, your lighting is fine, and thanks for keeping us up to date on the progress.
|
|
#189
09-02-2012, 11:34 PM
|
||||
|
||||
|
If anyone has any real, practical, tried tips about keeping a flatback flat for reglueing, send them through. This one wants to curl up like a potato chip. I've tried lots of things, dampening and clamping flat, using heat and clamps etc, drying out under lamps etc, but as soon as I pull the clamps off it starts to curl again. And not in the direction I want it to. Quite frustrating!! I'm now considering sealing the inside surface to slow the moisture loss.
|
|
#190
09-07-2012, 09:56 AM
|
|||
|
|||
|
Maybe you need to overbend it the other way? The cheeks look great by the way.
|
|
#191
09-08-2012, 03:26 AM
|
||||
|
||||
|
Is the back naturally so warped that you couldn't just work around it? I have to wonder about using any method of forcing something like that in a way it doesn't want to go - seems like at some point it will always go back where it wants to be and pull things apart, or at least introduce a lot of stress.
Maybe at some point a new back isn't such a terrible thing, if the original is just going to compromise the rest of the instrument.
|
|
#192
09-08-2012, 09:15 AM
|
||||
|
||||
|
Quote:
 ) ) I think it finally relaxed to a point that I could get it re-joined, but it didn't come out perfectly. I had at least one or two proud spots and one dip. I think that was due to a flaw in my clamping process. Which I will know better next time. However, the bass sounded much better after taking all of that stress out of the back and making it function as a unit. Do the halves at least match in their warpage? are they going different directions? Don't have all the answers for you, but hope you get it worked out. Best, Brian
|
|
#193
11-08-2012, 11:05 AM
|
|||
|
|||
|
Any progress, Matthew?
|
|
#194
11-09-2012, 02:30 AM
|
||||
|
||||
|
erm ... not enough to show just yet.
 waiting on some french-look tuners though.
|
|
#195
11-09-2012, 03:04 AM
|
||||
|
||||
|
Quote:
__________________
Ken Smith ~ http://www.kensmithbasses.com http://www.kensmithbasses.com/doublebasses/ http://www.facebook.com/KenSmithBasses https://www.instagram.com/kensmithbasses/ https://www.facebook.com/ken.smith.904750 
|
|
#196
11-18-2012, 07:34 AM
|
||||
|
||||
|
the original tuners are not in very good shape. And probably not worth restoring. What do you recommend as an alternative, Ken?
|
|
#197
11-18-2012, 07:40 AM
|
||||
|
||||
|
I know you didn't ask my opinion, but if the originals are completely unsalvageable, my personal choice would be Sloane all day long. They're the only machines I would choose for my own personal bass.
edit - and yes, I know they're nowhere close to original appearing or anything, and they're heavy and expensive (and slow) - but they work!
|
|
#198
11-18-2012, 09:23 AM
|
|||
|
|||
|
Matthew, there is a guy in France making total copies of the old French bass machines. I have seen them on Laborie basses I think. With your excellent research skills, I bet you can find him. When you do, get me in please...
|
|
#199
11-18-2012, 09:49 AM
|
||||
|
||||
|
Quote:
My Jacquet-Pillement came to me with replaced gears already so I never had the chance to restore the old ones. Starting as a 3-stringer, if modified with a 4th French gear, it is more than likely a mis-match anyway. My Lamy that was converted recently from 3 to 4 has 3 different kinds of gears. Only 2 of them match but are all similar. You can have a look at the Gears of the Jacq-Pill but I am not sure what the gears are on the bass or if still available. The Lamy is an example of one or two gears being added or replaced that almost match. That is another idea unless yours are totally shot. The old ones do however look best on a bass like that.
__________________
Ken Smith ~ http://www.kensmithbasses.com http://www.kensmithbasses.com/doublebasses/ http://www.facebook.com/KenSmithBasses https://www.instagram.com/kensmithbasses/ https://www.facebook.com/ken.smith.904750
|
|
#200
12-16-2012, 09:43 PM
|
||||
|
||||
|
The back has been a pain to flatten, so i'm going to try a new approach. First I had to see whether I needed to add some wood to the centre back seam.
First, I tacked the repaired top onto the ribs 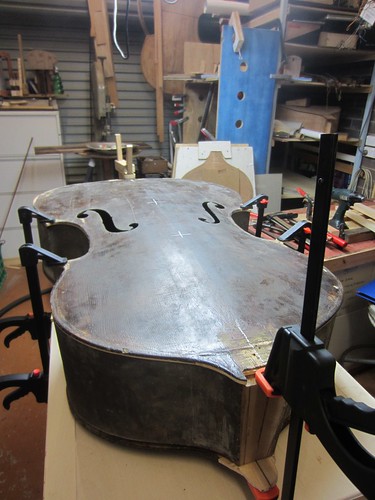 This allowed me to position the bass on the back to see how my overhangs are looking. 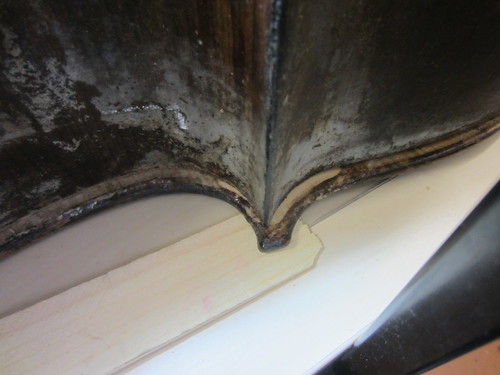 With the top tacked on I can move the corners and ribs around to see if everything will fit. It's been apart so long, not everything lines up nicely. But with a bit of persuasion, I am convinced everything will eventually go back as needed. I decided to add a thin centre strip. Pictured below is my setup for gluing to one side only. The long hardwood beam holds the back flat to the perspex backing.   I use wedges to clamp the hardwood strip to the side. 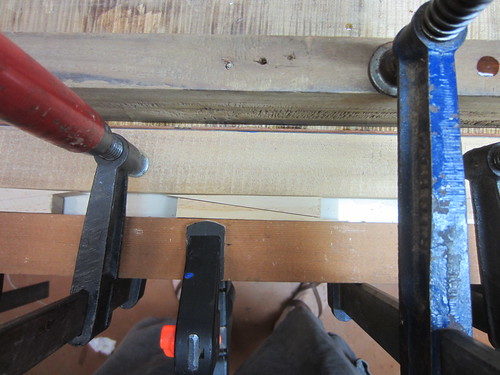 The strip will be trimmed down to the width of the back plate, then I'll have another challenge to glue the other side.
|
 |
| Currently Active Users Viewing This Thread: 28 (0 members and 28 guests) | |
|
|


 Linear Mode

